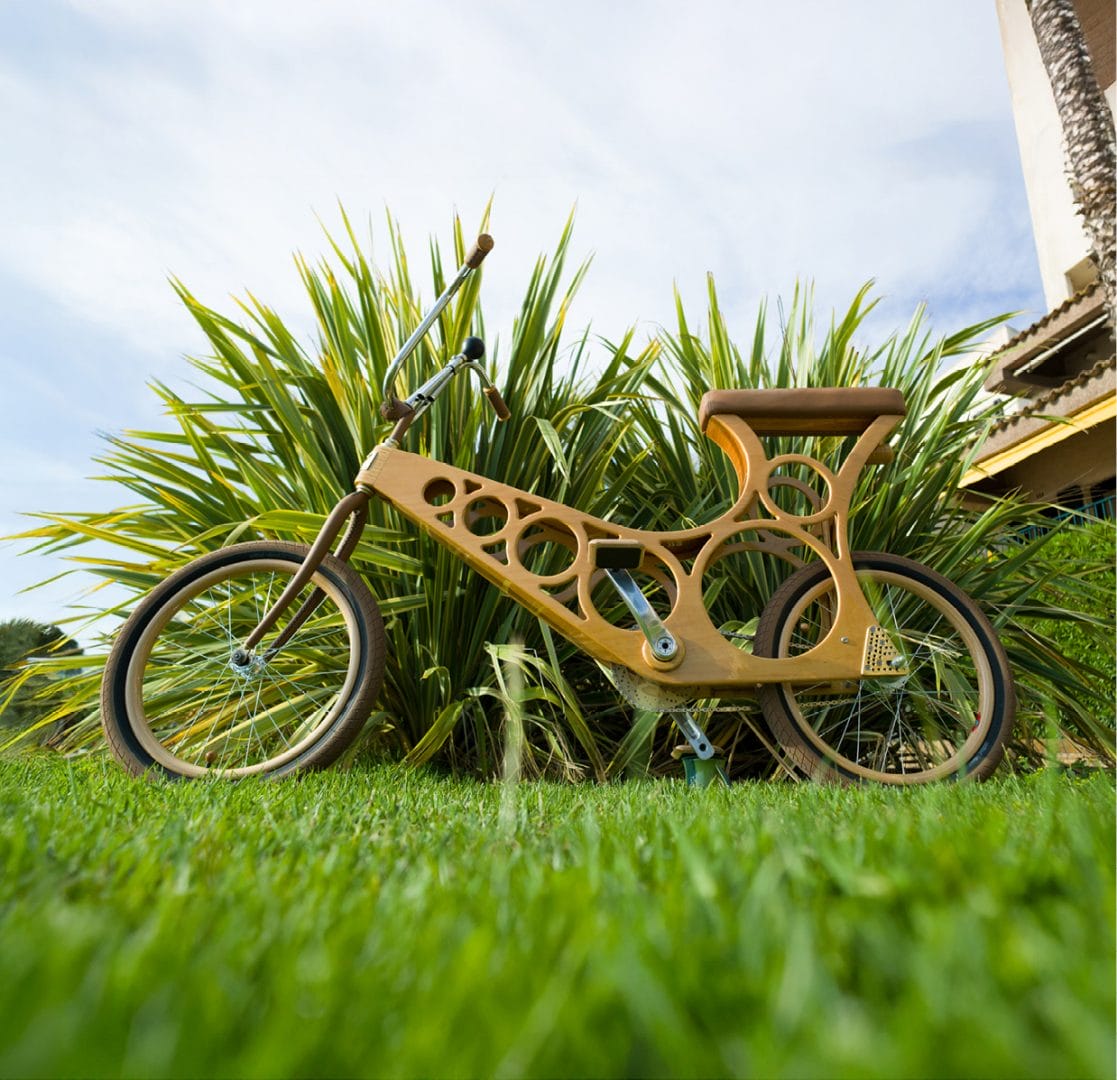
The Hoopy Wooden Bicycle
Spring, 2026

GET STARTED
FREE PRINT & DIGITAL EDITIONS
Spring, 2026
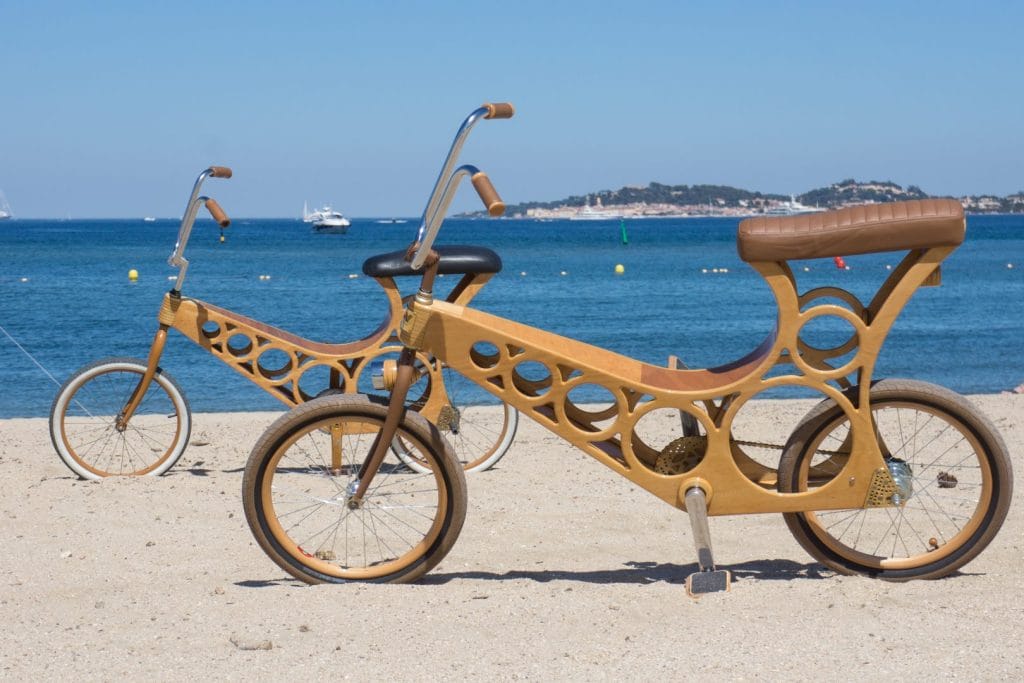
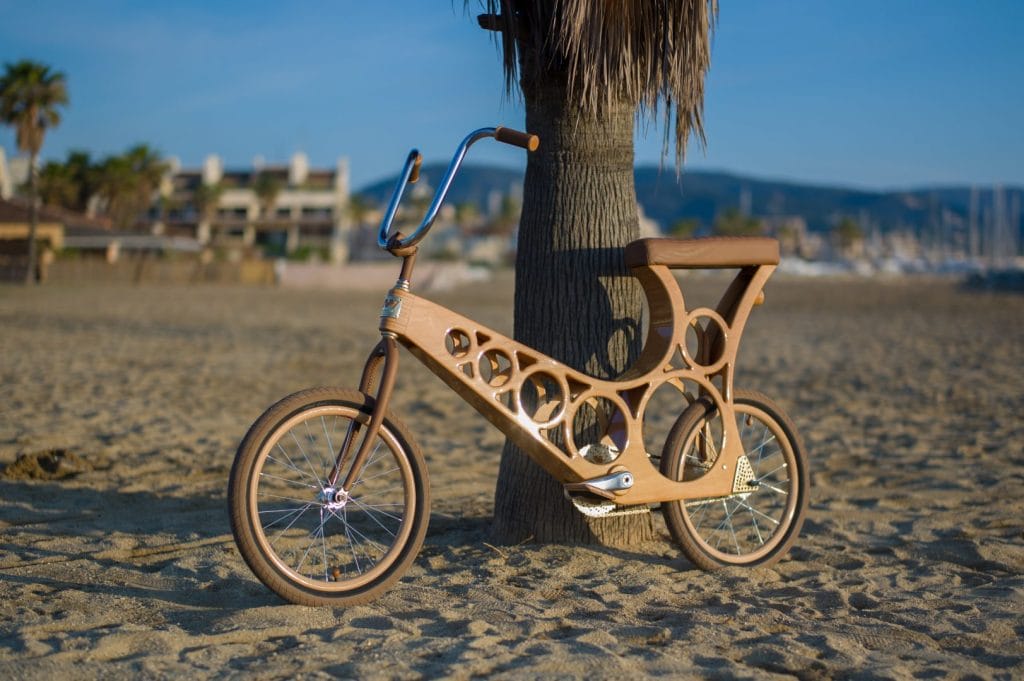
The Hoopy Wooden Bicycle (or just the Hoopy) is a Woodenwidget design which could not exist without WEST SYSTEM® Epoxy. There is not a fastener in it. The Hoopy had been an idea of mine for a very long time. The original idea was to make the frame using hoops of steamed wood, riveted together with copper boat nails. It would require great skill to build, but the end result would be spectacular.
The trouble was figuring out the right proportions. I decided to simplify and test the concept before attempting it. Rather than lots of hoops, I made a simple frame from two sheets of plywood. The frame design was cut to mimic the original concept of hoops, and this is also where the name for the bike came from.
What was going to be a long, winding labor of love turned into a very simple two-day affair. It didn’t take long at all to make the frame. It took longer to varnish it than it did to cut it out and epoxy it together! As I wasn’t sure about the geometry, I built the prototype very quickly at first just to see how sound the concept was. There’s not much point in making a beautiful wooden bicycle if it doesn’t ride well.

I had no idea what I was doing or what made a good bike. In a way, this was a blessing as I wasn’t tied to any conventional wisdom. I could do whatever I wanted—just to see if it worked. The angle of the headstock was done by eye. I came up with a simple system for ensuring the wheels would remain in line while the frame was epoxied—locking them to the workbench during assembly. It worked well.
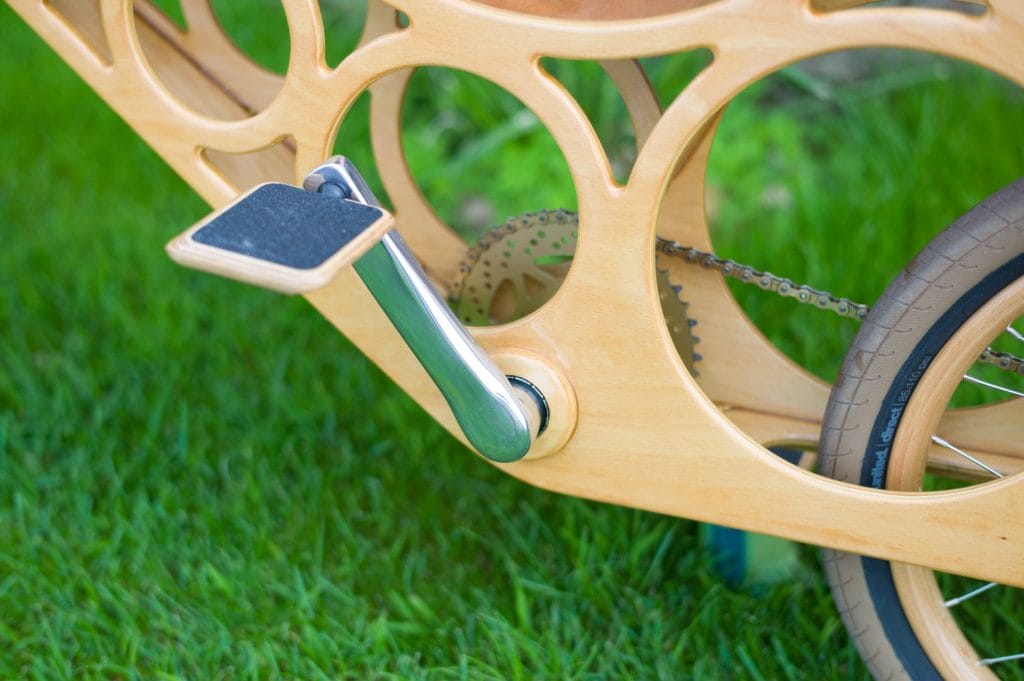
One of the most unusual aspects of the Hoopy is the position of the front sprocket. I decided to fit it inside the frame—not outside as most bikes. I have never been one to follow the flock and didn’t want to repeat what hundreds of other wooden bike makers had already done. I wanted to do something different.
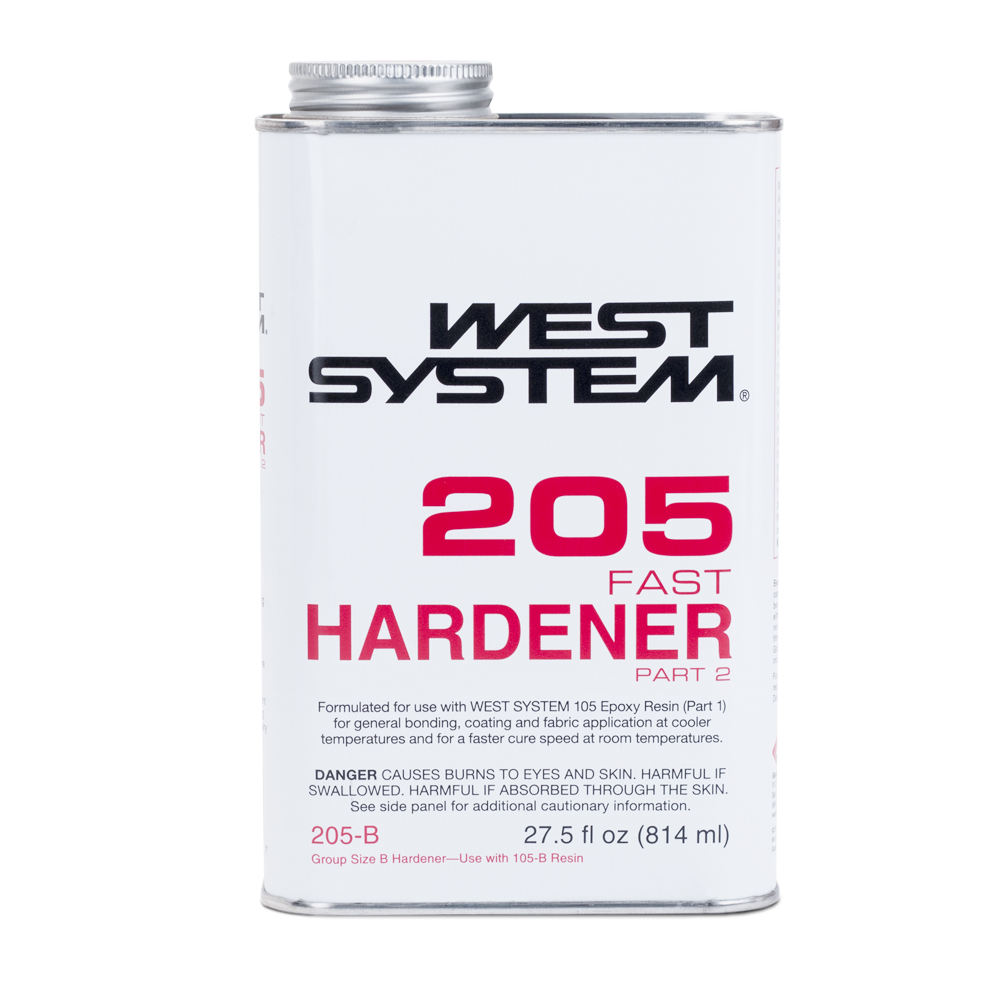
Fitting the drive inside the frame proved tricky. I solved the problem using a modern structural epoxy (WEST SYSTEM) and a special clamp that gripped the bottom bracket shaft. Then I bolted the front sprocket to it. The advantage of having the drive train inside the frame is a cleaner look and no more oily or ripped trousers! Finding a strong, simple, and reliable drive solution was the hardest aspect of the entire design. By contrast, epoxying the frame together with WEST SYSTEM 105 Epoxy Resin® and 205 Fast Hardener® was a doddle!

The first prototype was rough around the edges, but despite that, it worked really well. It was comfy to ride and had good speed. You could even take your hands off the bars and the bike would track beautifully. Later on, I started to investigate and learn more about the geometry of a bicycle. I tried to understand the angles of the headstock and their effect on the way the bike rode. My prototype had a 72.5-degree headstock angle because it just looked right to me. According to the literature, this was just what you would expect a cruising bicycle to have, and I had done it by eye!
Having proved the concept of the Hoopy, I decided to make a second one with higher-quality materials and take more care in the build. In short, a posher version of the original. The frame build took just two days, but I spent 20 hours varnishing it! That was extremely difficult to do, but after eight coats, I was finally happy with the finished result.
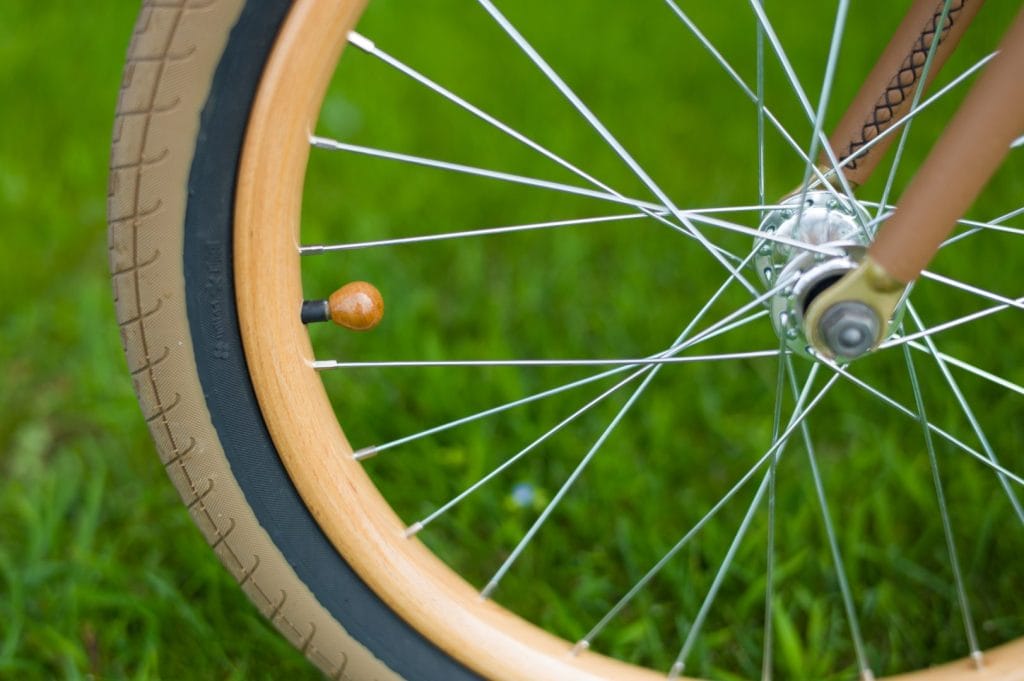
I wanted this Hoopy to be really special, so I bought a pair of Cerchio Ghisallo wooden wheels. These are amazing, albeit very expensive. They even have a carbon insert to reinforce them so the tires can be inflated to an astonishing 101 psi. (7 bar) if needed!
I had them fit a Sram® two-speed automatic hub at the rear so the bike would have gears, but without the complication of cables or other ugly moving parts. It’s a brilliant system. Once the speed increases to a certain amount, the gear changes. As you slow down, it automatically drops into first gear again. It’s a very clever, clean, and maintenance-free system. It has the added bonus of a back-pedal brake, which further reduces the need for cables and leaves the design looking very clean and uncluttered.

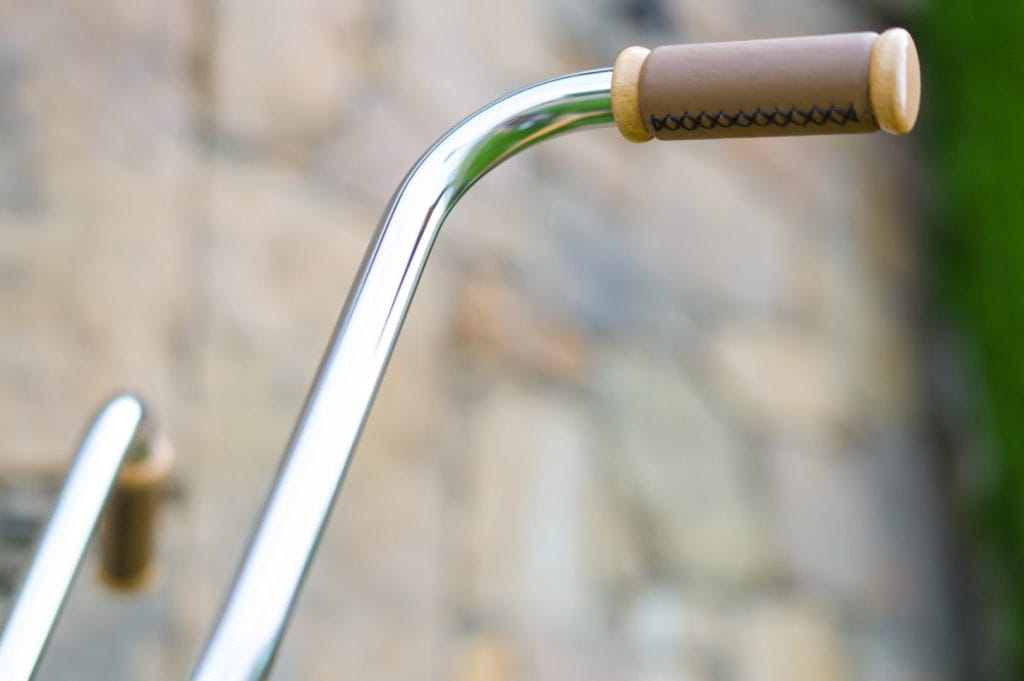
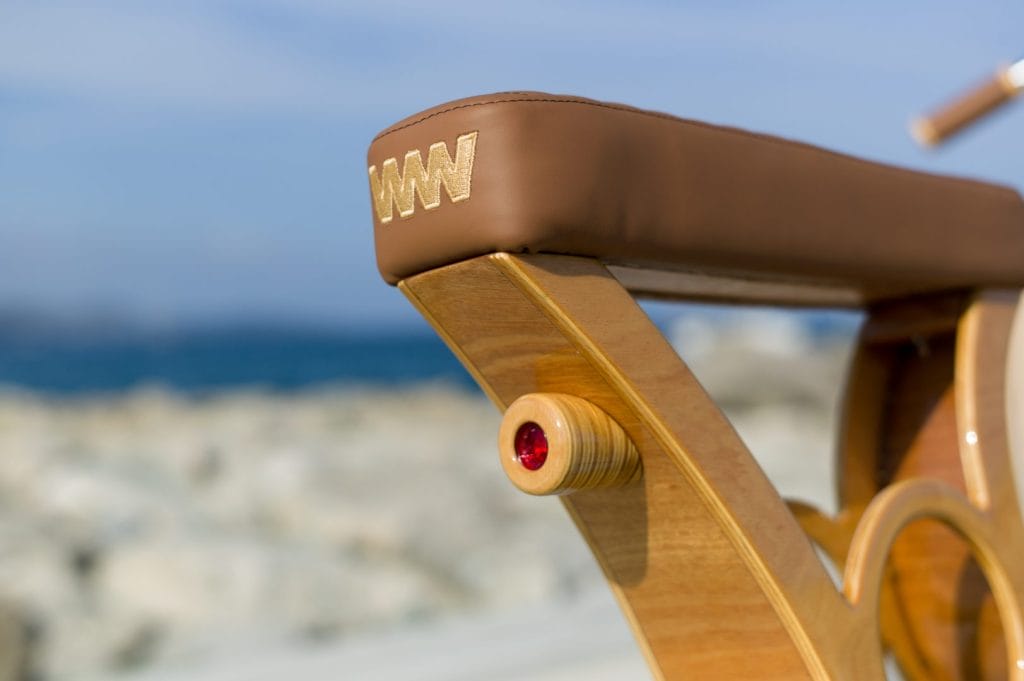
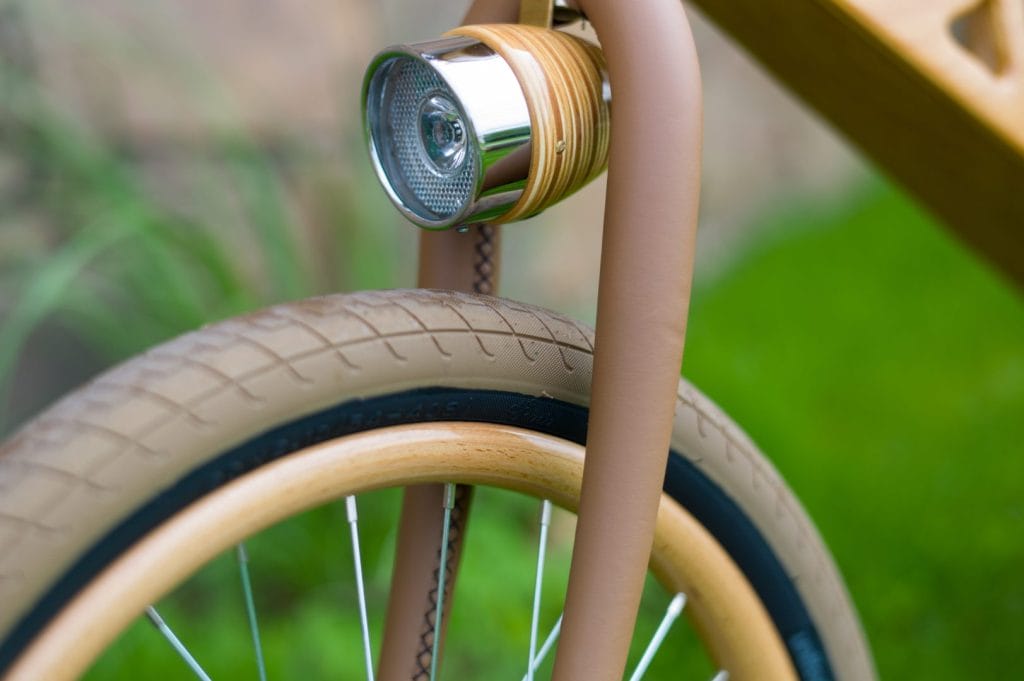
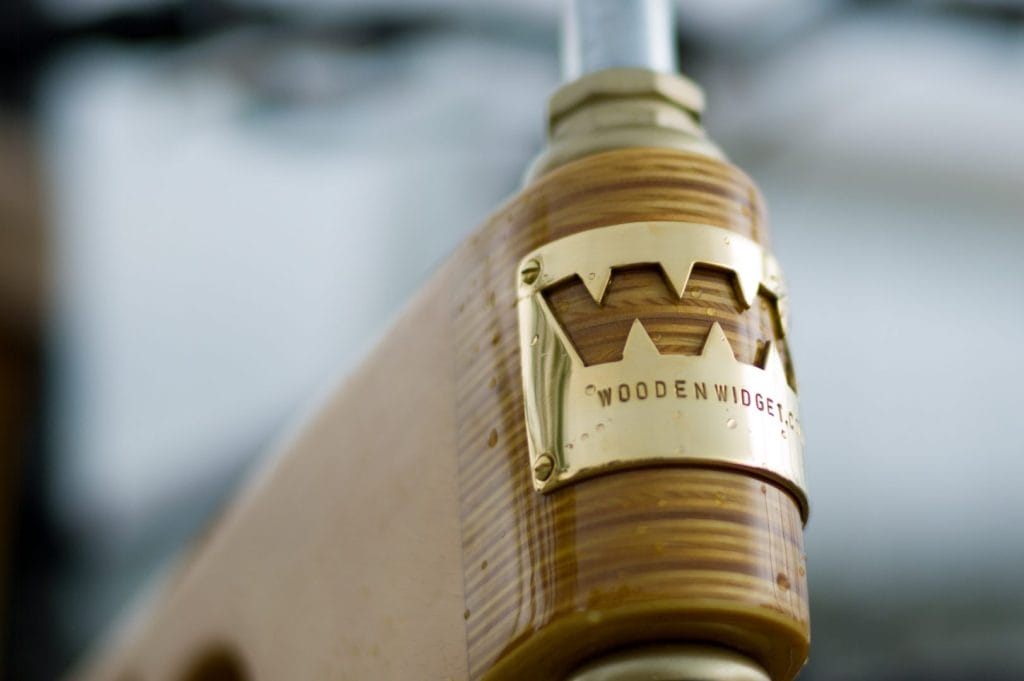
Other nice touches include the wooden pedals and the handgrips, which I bound in the same leather I used to make the seat. While I was at it, I covered the front forks with leather, all sewn on by hand. It took ages to do, but the end result is worth it. A friend embroidered a Woodenwidget logo (WW) on the back of the seat leather, and I made wooden lights for the front and rear. Just for fun, and to add that final bit of class, I made a polished brass builder’s plate and screwed it to the headstock. (The only fasteners on the bike!)
It’s been nearly ten years since I built this bike, and it is still in amazing condition. The frame is practically indestructible thanks to its epoxy construction.
There is a YouTuber, called Sam Pilgrim, who somehow got hold of a Hoopy one of my customers had built. For fun, he tried his best to destroy it. He broke the wheels and many other parts, but the frame remained intact despite his best efforts. As a designer, it is very gratifying to learn that your idea is sound.
I have been using epoxy for over 30 years and love the freedom it gives me as a designer. I still dream about making a real Hoopy using many steamed wooden hoops, but I doubt it would be as stiff, strong, or as long-lived as the simpler epoxied version. As they say, if it ain’t broke don’t fix it!
Learn more about WEST SYSTEM Epoxy.
Learn more about Woodenwidget Designs.