Epoxy Thermoforming Patterns
Spring, 2026

GET STARTED
FREE PRINT & DIGITAL EDITIONS
Spring, 2026
A benchtop vacuum-forming machine can be used in conjunction with homemade epoxy patterns to make a wide variety of thermoformed plastic parts and pieces. I used WEST SYSTEM® products to craft an aluminum-filled epoxy pattern with improved heat transfer for making clear PETG chocolate molds. The process is very approachable and is something you may be able to utilize, too.
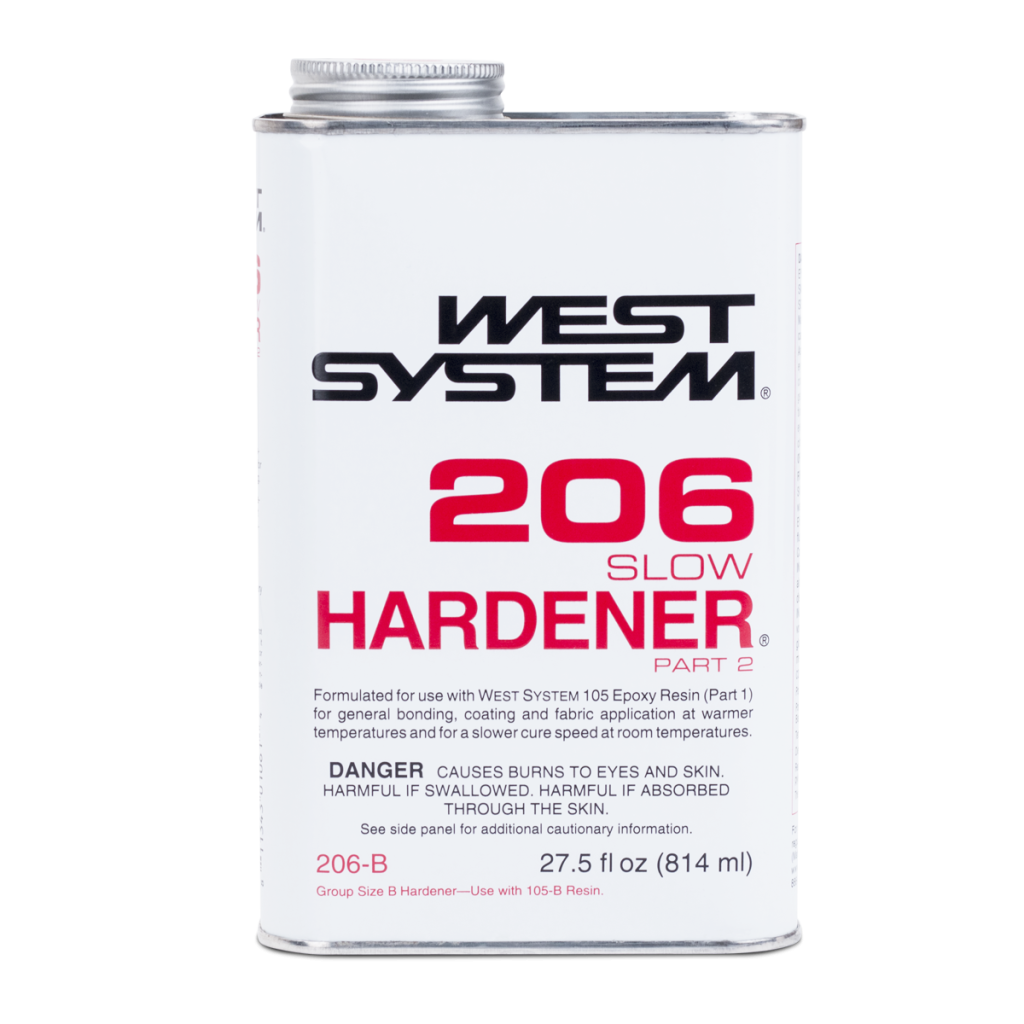
For this process, you will need the following supplies from WEST SYSTEM: 105 Epoxy Resin®, 206 Slow Hardener®, 420 Aluminum Powder, reusable mixing sticks, and a reusable mixing pot. You will also need two-part silicone mold rubber, sewing pins, mold release spray, sheets of thermoforming plastic, and a benchtop vacuum-forming machine.
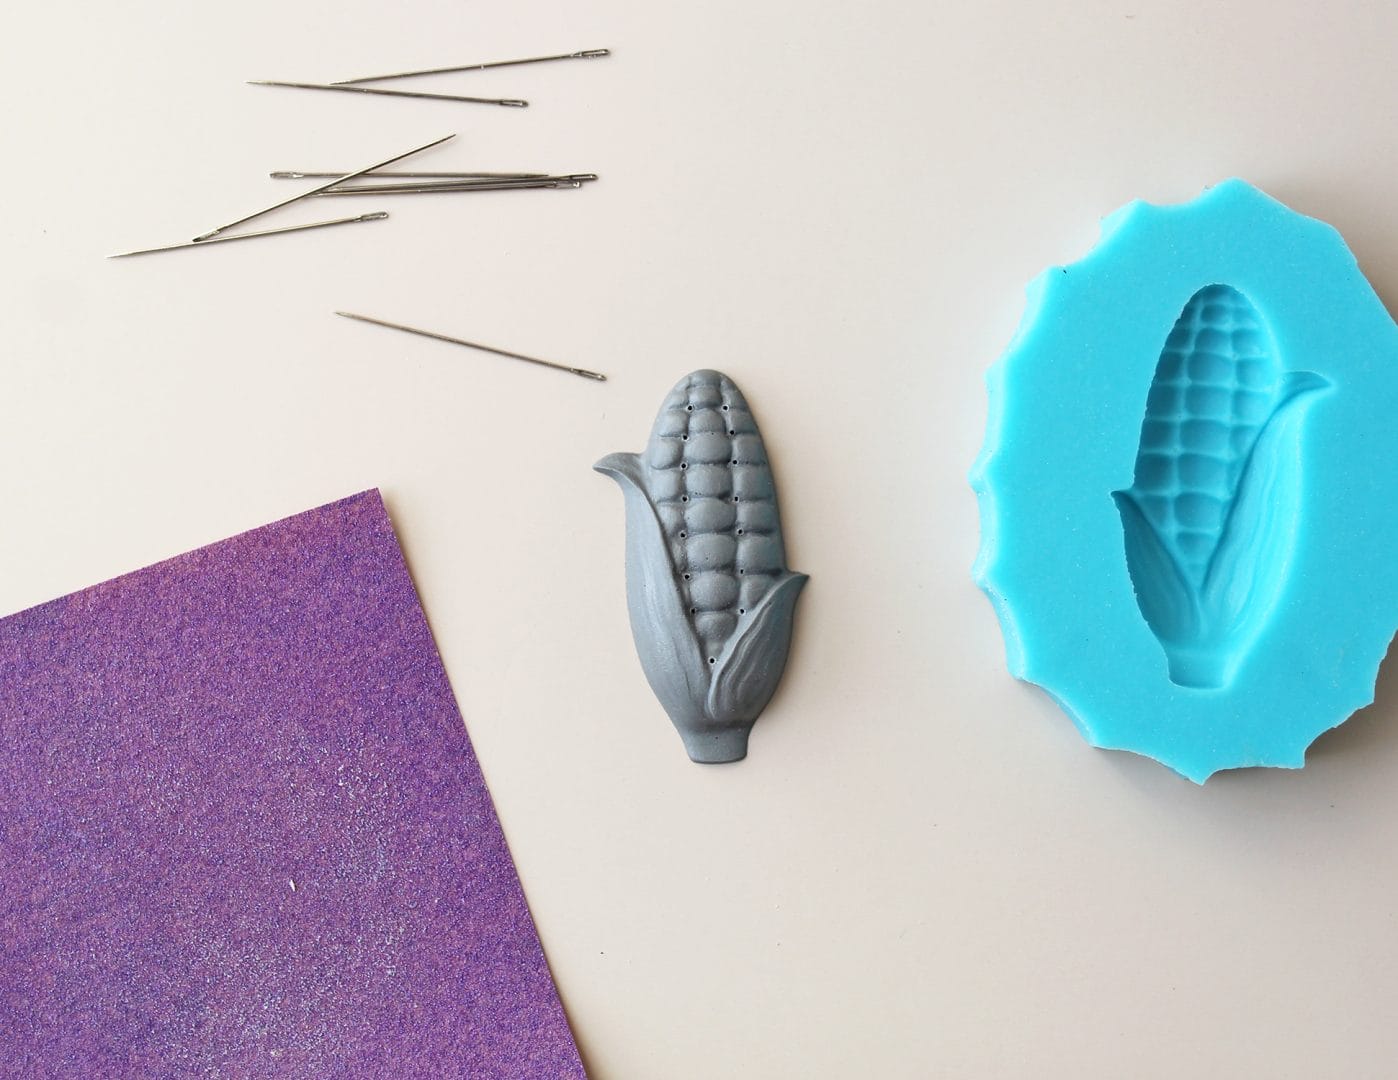
To get started, create an original model. For this demonstration, I sculpted a bas-relief ear of corn out of modeling putty. If sculpting is not your forte, feel free to use a 3-D printer instead. For best results, the model should have a relatively thin cross-section and no undercuts.

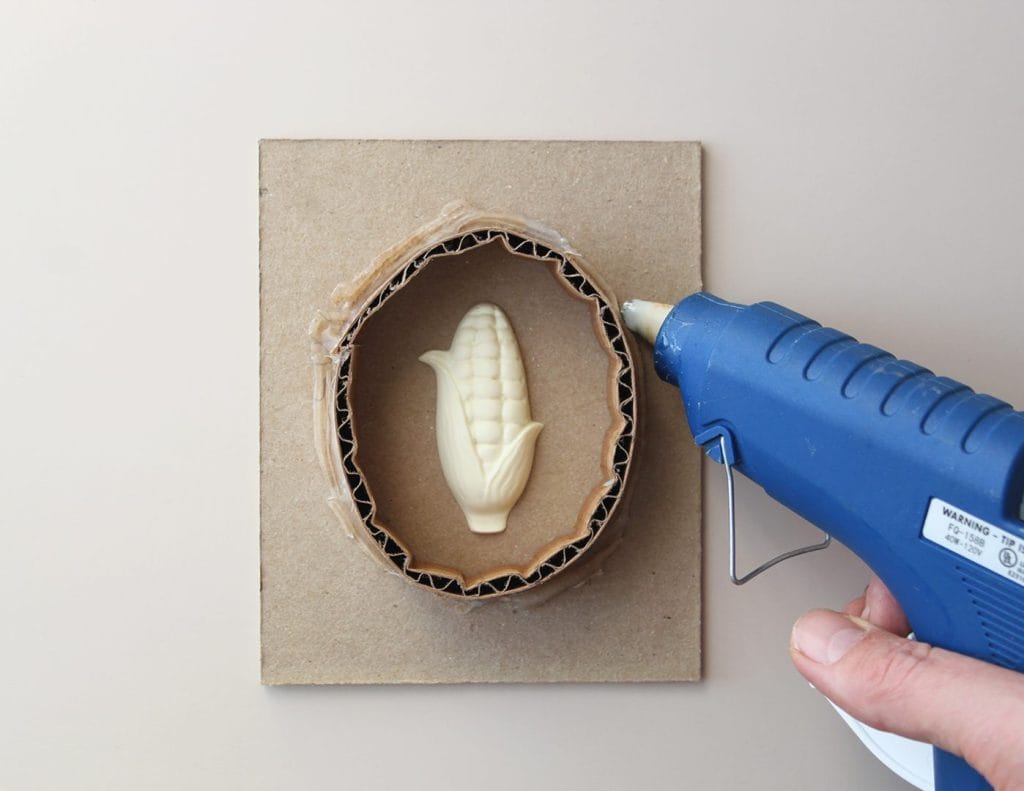
Next, use a hot glue gun to attach a strip of cardboard around the model.
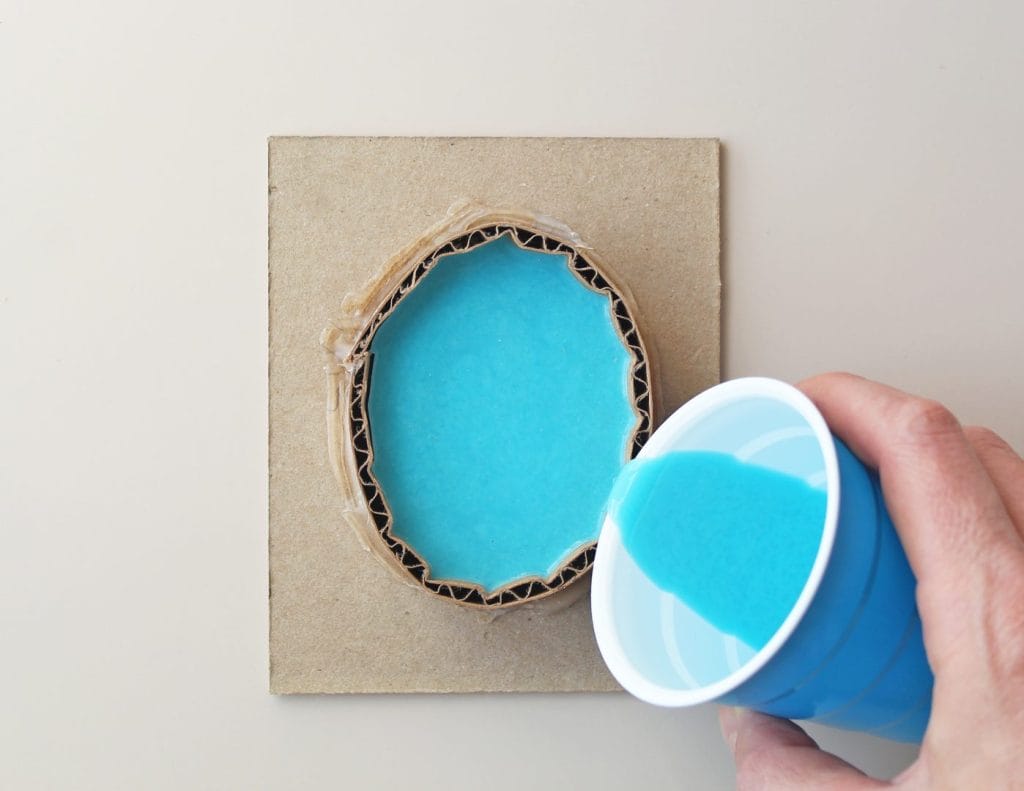
Mix a batch of two-part silicone mold rubber and pour it over the relief.
After the rubber has cured, insert sewing pins into the mold as shown. The pins will be extracted later on to create air vents in the aluminum-filled epoxy.
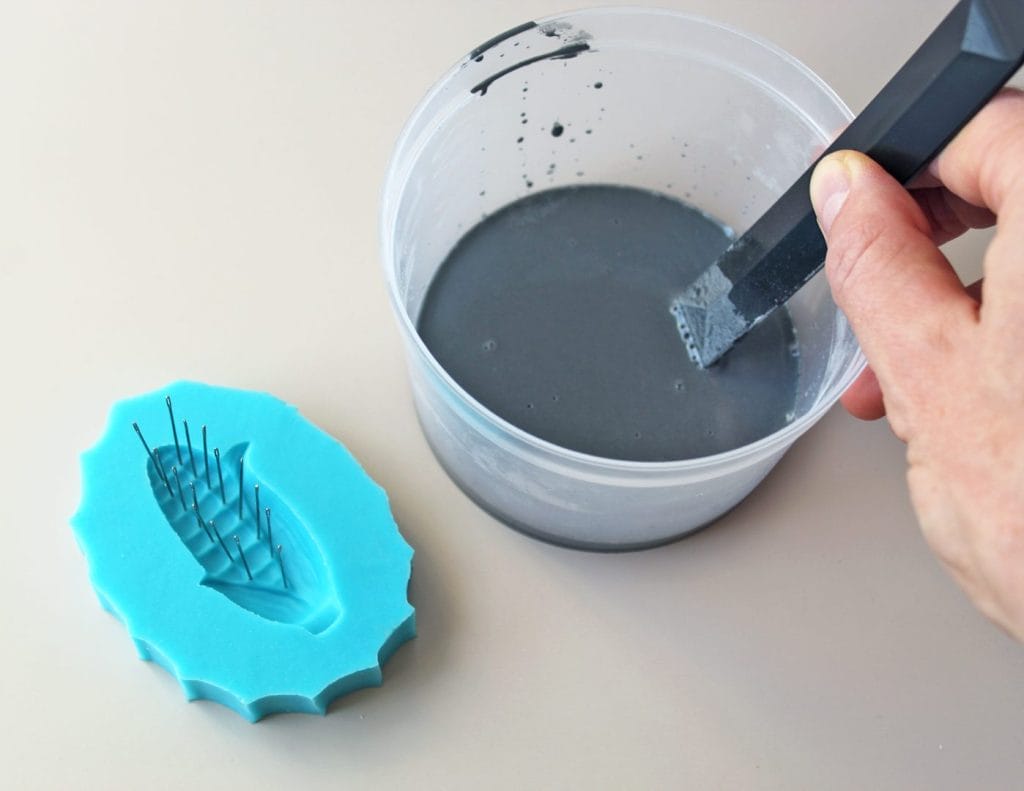
To mix the epoxy, you will need five parts WEST SYSTEM 105 Epoxy Resin, one part 206 Slow Hardener, and three parts 420 Aluminum Powder, by volume. Combine the 105 Epoxy Resin and 206 Slow Hardener in a reusable mixing pot. Next, add the 420 Aluminum Powder and stir with a reusable mixing stick for two minutes. Coat the mold with release spray and pour in the aluminum-filled epoxy.
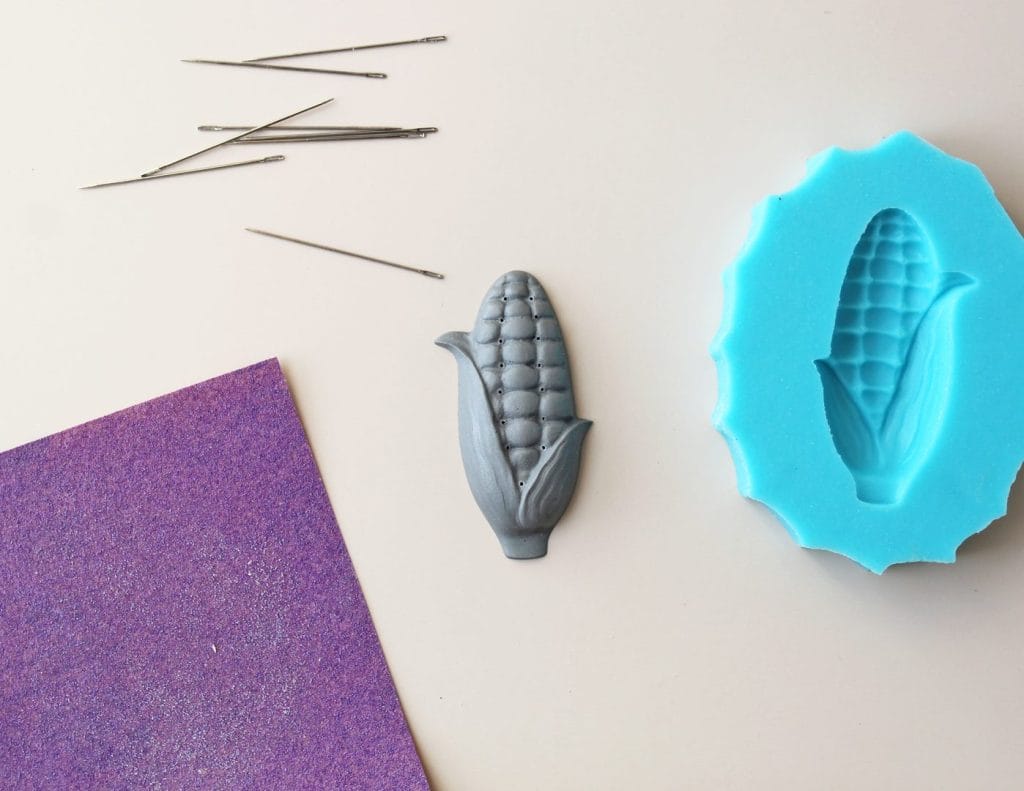
Let the epoxy cure overnight and then pull out the pins with a pair of pliers.
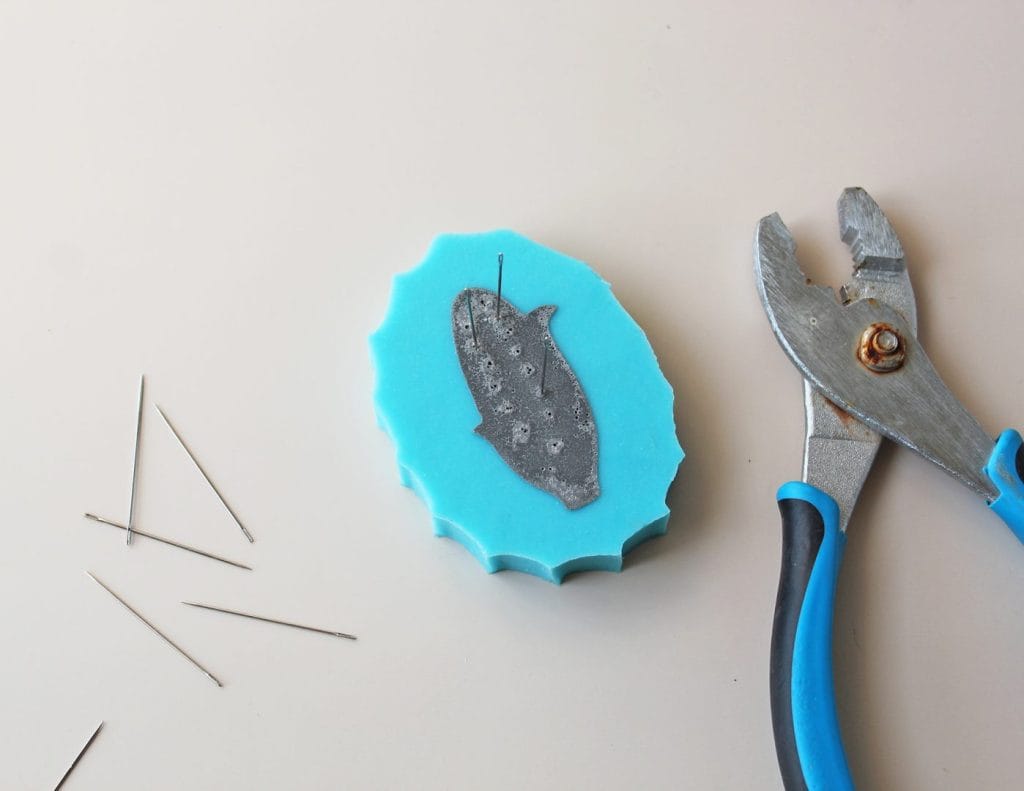
If the bottom of the epoxy pattern is uneven, flatten it with sandpaper. When you are finished sanding, clear the dust from each vent hole using one of the sewing pins or a can of compressed air.
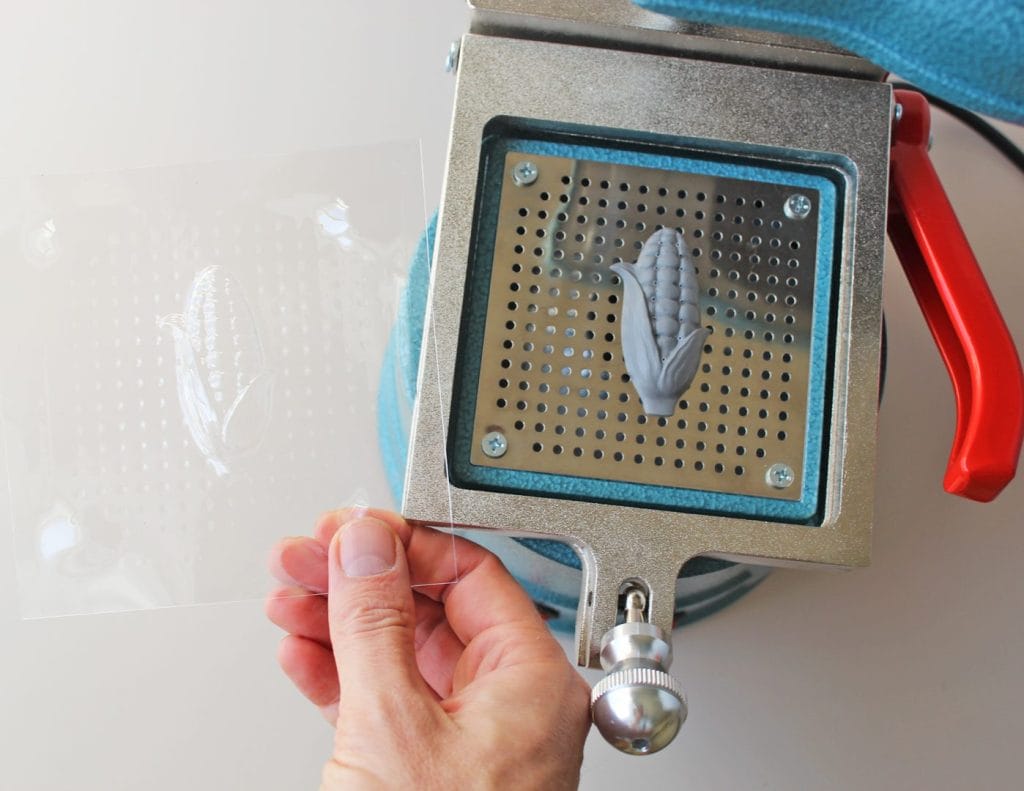
To vacuum-form the finished product, center the pattern on your machine’s molding table, insert a sheet of PETG plastic in the clamp frame, and switch on the heating element. As it heats up, the plastic will rise slightly and then slump back down. When it does so, switch on the vacuum and quickly lower the frame over the pattern.
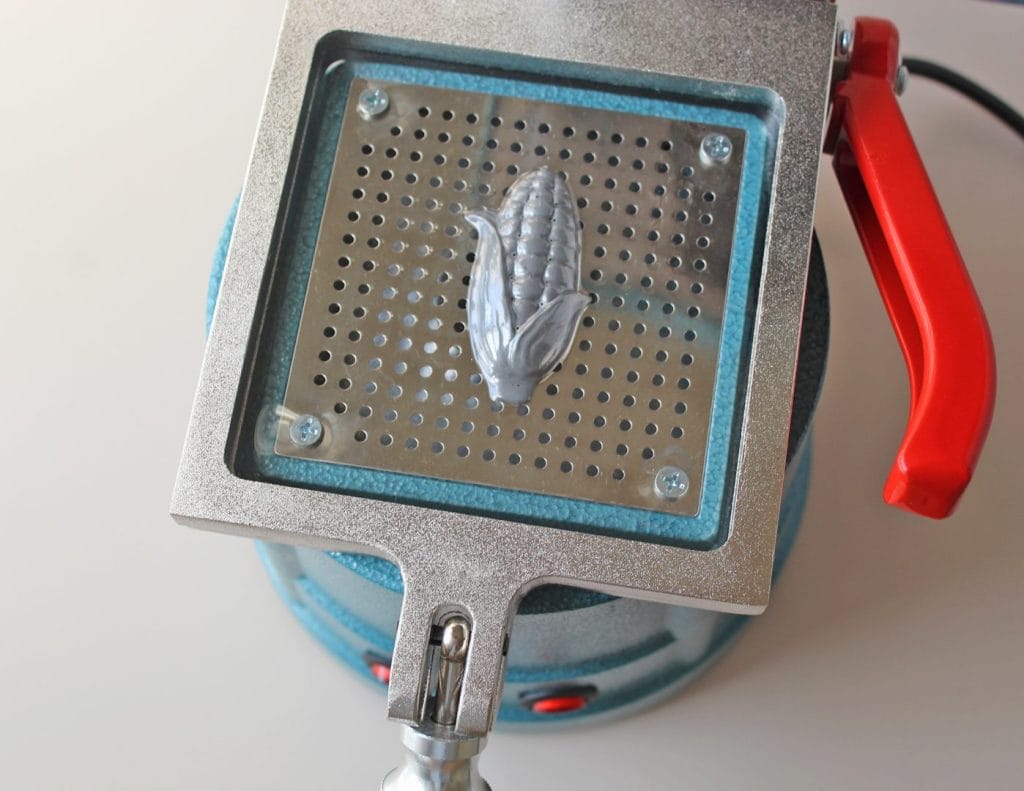
After a few seconds, turn off the machine and remove the molded sheet of plastic. Let the pattern cool down before repeating the cycle.
For this demonstration, I used .02″ food-grade PETG plastic to make chocolate molds to share with friends and family.
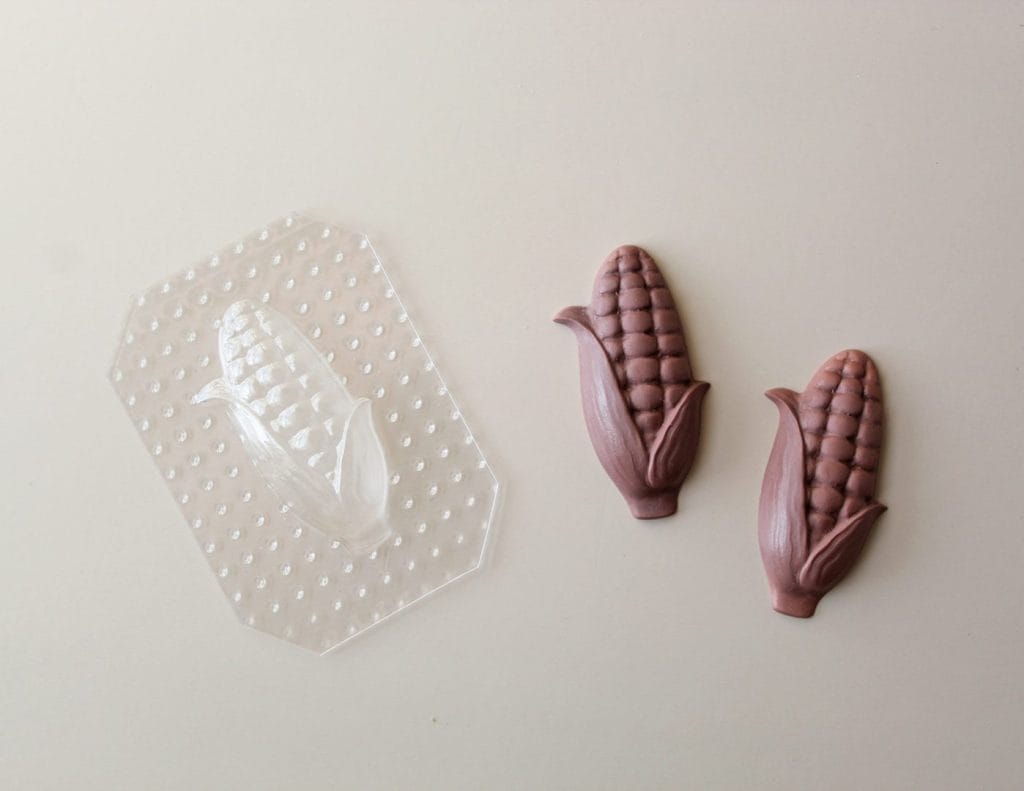
Other items that can be made with a benchtop vacuum-forming machine include model airplane parts, slot car bodies, and custom packaging.