Building the Arch Davis Sand Dollar
Spring 2009

GET STARTED
FREE PRINT & DIGITAL EDITIONS
Spring 2009
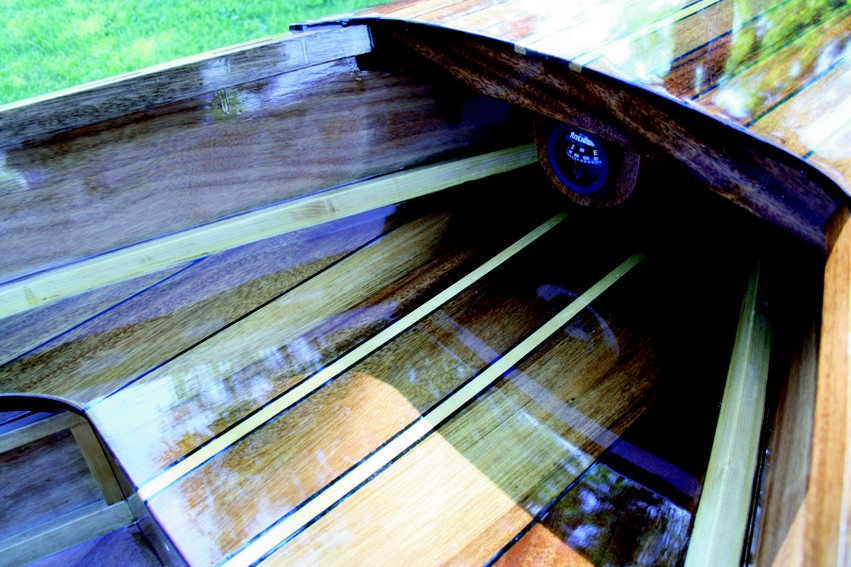
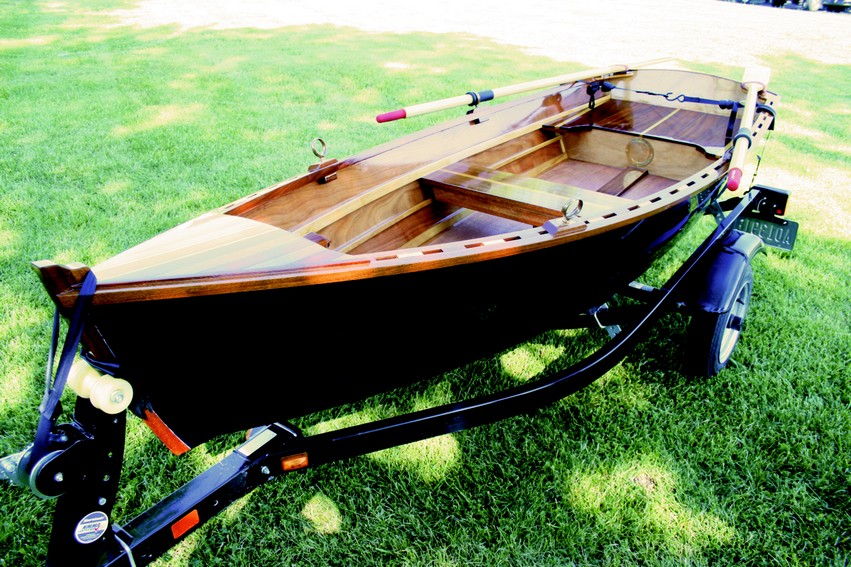
Above: The varnished interior of my Arch Davis Sand Dollar has 10 to 12 coats of Captain’s
Spar Varnish™ over the 105/207 epoxy coated surfaces.
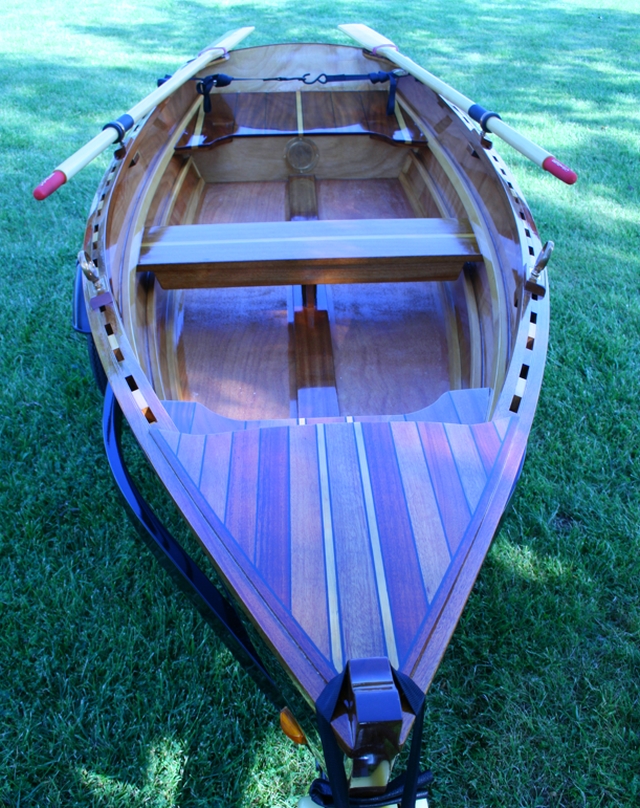
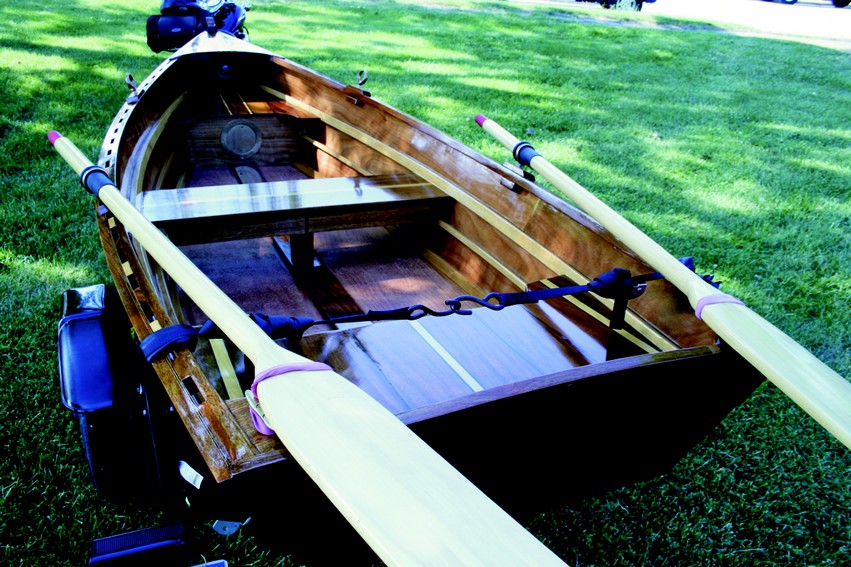
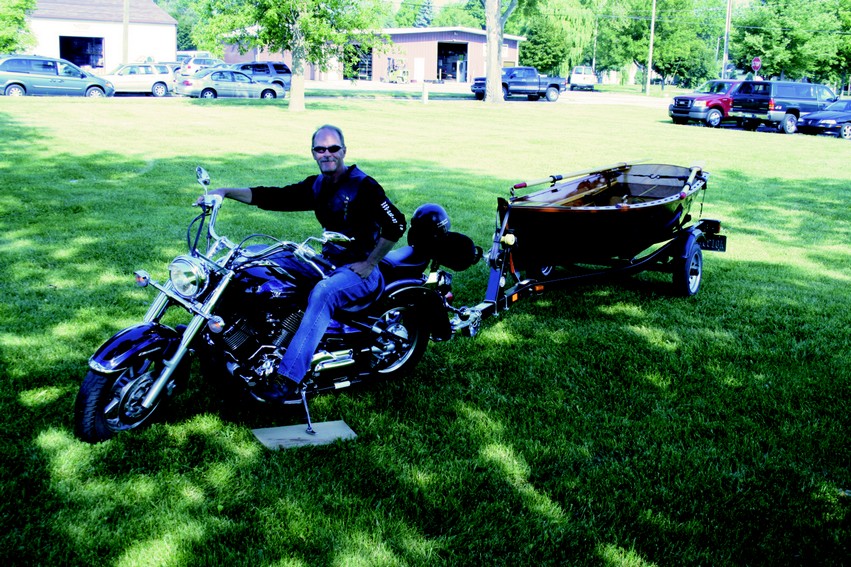
The Arch Davids Sand Dollar is designed as a row-able sailboat but, since my father, brother, and I have about a dozen sail and powerboats between us, mine would be a rowboat only. This meant I didn’t need to build a centerboard and trunk, a rudder, or a mast. The seats, bow deck, and gunwales are made of mahogany with Sitka accents. The lightweight Sand Dollar and its trailer tow easily behind a motorcycle. The interior wood was left natural—seats, bow deck and gunwales are mahogany with Sitka accents. The hull is painted with House of Color™ Midnight Blue Pearl.
We’ve had various types of boats in my family since the ’60s, beginning with a painted canvas and flat-bottom wooden canoe my father built which we used for bow fishing. My grandfather bought a 1959 Lonestar fiberglass ski boat with a 35 hp Evinrude outboard for his kids and grandkids, among the first seen on Sand Lake in northern Michigan. Grandpa never set foot in it though. He preferred his little 14′ aluminum rowboat powered by his trusty old outboard to take us fishing for largemouth bass and pike.
I have been using WEST SYSTEM® epoxy since about 1973 when my brother Randy and I bought a plywood hydroplane-style boat with a 90 hp outboard. As teenagers, we beat the hell out of it. We broke it on a regular basis and we’d glue it back together with epoxy filled with reinforcing fibers. We finally broke it beyond repair in ’76—it made a great bonfire.

I cut my boat-building teeth, so to speak, building a modified Optimist pram. I borrowed the patterns our local community sailing association (SBCSA) used to build their fleet and laid out the hull sides, bow, and stern with 3″ more freeboard. Rather than a sailboat, I intended to use it as a rowboat tender for my 30′ Sea Ray. With this project under my belt, I was ready to widen my boat-building skills.
While reading my favorite magazine, WoodenBoat, I came across an ad selling plans for the Sand Dollar from Arch Davis. I took a chance and ordered a set online. I studied the plans for a few days and decided this was a project I could build by myself in my garage, which is set up as a woodworking shop. I’ve built a lot of furniture—bed frames, tables, and clocks—which are in essence big square boxes with fancy trim. This boat would be anything but that. I found the plans, instructions, and video to be excellent and very helpful.
I started by building the stem. I laid out the pattern (which comes full size on Mylar™ film) over a 1″ mahogany board, then used a nail to poke holes defining the shape. It was easy to simply connect the dots and cut out the part. The rough shape was sawn from 2″×1″ thick boards laminated together. Next I built the transom from two layers of ¼” okoume plywood, also laminated together. I used the two-step bonding technique as recommended in the WEST SYSTEM User Manual for each of these parts. I coated each mating surface with unthickened epoxy, allowed it to penetrate, then mixed resin and hardener and thickened it to a catsup consistency with 406 Colloidal Silica filler. I applied the mixture to one of the surfaces and secured the parts together until cured. This does take more time but provides a more reliable bond by preventing glue-starved joints. gain, I laid out the Mylar film pattern and used a nail and hand pressure to create the shape. I’m apparently not as hard as nails because this really hurt my hands.
With both ends made, I started building the strongback from 1″×10″ clear pine. It is basically a long skinny box on sawhorses. After making sure it was level and square, I attached the frames to it. Next, I spray painted around the legs of the sawhorses so I could move the whole assembly and put it back exactly where I’d started if for some reason I had to move it.
The first parts mounted to the strongback are the temporary frames, which help define the hull shape but will not be a part of the boat. I cut these frames from ¾” particle board, but this time I tried using carbon paper under the Mylar pattern to trace the lines instead of using nails. This was much easier and faster. I defined and drew a centerline and starting point onto the top surface of the strongback so I could position and layout the frames accordingly. I took care to mount them square to the centerline and perpendicular to the horizontal plane. I mounted the transom next, forming the last “frame.” Then I mounted the stem to the front of the strongback and extended it into the first frame. There are two bulkheads, one each fore and aft, both cut from ¼” okoume and framed with Sitka spruce. These were secured to the appropriate temporary frame and remain a structural part of the hull.
At this point the basic shape of the hull was defined and it was time to mount the keel. I attached ¾”×5″ mahogany plank to the transom with epoxy and clamps, bending the plank across the frames and securing it to the stem, again with epoxy and clamps. Next came the Sitka spruce stringers—one on each side of the keel and three on each side, glued into notches in the frames. With the “skeleton” ready, I installed the bottom and side planks which I made from ¼” okoume. The overall length of the stock needed to be 11’6″, so I needed to scarf the plywood to get there. The problem was I’d never made a scarf joint before. So I approached the tech guys at Gougeon Brothers, Inc. My brother Bruce, who is a tech advisor there, showed me a technique using a hand plane and belt sander. My first scarf joint turned out perfect, the last one—not so much. I pre-coated each plank with three coats of 105 Resin®/207 Special Clear Hardener ™, prepped them for installation and glued them in place. I used deck screws as temporary clamps until the epoxy cured.
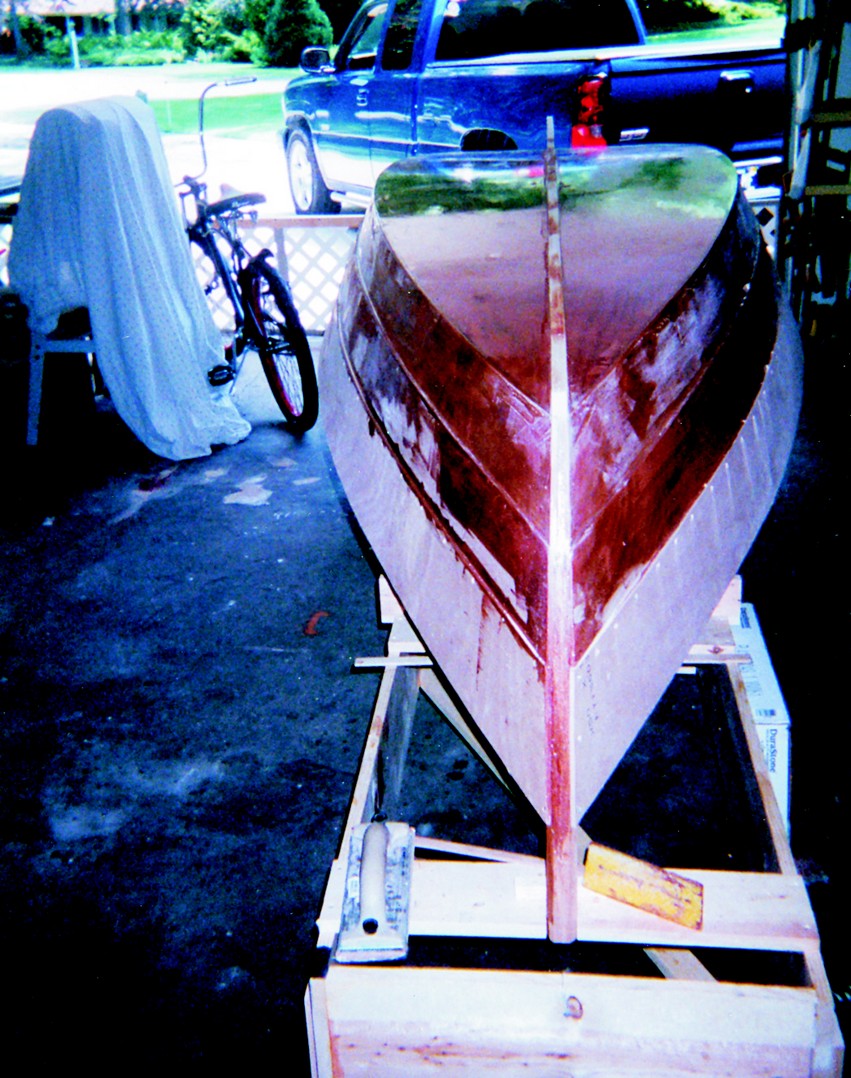
Now came the character-building portion of the project—fairing the hull. My plan was for the outside hull to be dark blue, so it had to be perfect because any little divot or imperfection would stick out like a sore thumb. Fill and sand, fill and sand, fill and sand. Eventually, it was done to my satisfaction and the hull was ready to be flipped right side up. Now, I would never pretend to know anything about the experience of childbirth, but as soon as I saw the hull upright and it looked like a boat, all the pain of sanding and fairing was immediately forgotten. I had a new baby boat.
The bow has lines of graphite-filled epoxy between the strips for that classic look. But when sanding the graphite mixture I learned dust would get in the wood grain and cast a gray shadow that took some doing to get clean. I asked my brother how I could avoid the issue and he suggested using a black paint pigment instead of the graphite. (see Epoxyworks 21) This worked much better for me and sanded out clean. It’s handy having family on the Gougeon tech staff.
I worked slowly and carefully to fit and install the trim because I wanted it to look like a piece of fine furniture. Once the trim was done it was time to paint the hull. I enlisted >the help and expertise of my nephew Alex, who worked at Psycho Custom Cycle, a motorcycle shop, prepping and painting custom frames and tanks. He arranged for the use of the shop’s facilities to spray paint the hull. We decided on House of Color™ Midnight Blue Pearl, which requires a four-step process: primer, black base coat, midnight blue, and four coats of clear. The paint is popular these days on cars—a “flip-flop” color that looks blue or black depending on the conditions at any given moment. The hull looks awesome and draws lots of oohs and aahs from many an admirer. Thanks, Alex. I took the boat home to varnish the interior woodwork, applying 10 to 12 coats of Captain’s Spar Varnish™ over the epoxy-encapsulated surfaces. You know what that meant more endless hours sanding between coats. I asked my pal J. R. Watson at Gougeon Brothers how many coats of varnish I should apply. He said three coats would be adequate, but just keep going until I couldn’t take it anymore.
After addressing a few minor details I was finally ready to launch my Sand Dollar. It rows great—easy and fast. In the end, with all my complaining about sanding aside, the boat was no work at all to build, just pure fun. I don’t know what I’ll do with it now that the building is complete. I’ll probably sell it (as of this writing it is for sale) and start another project. I’ve been eyeing plans for an electric launch. You know the story of the boatbuilder who won the lottery? When asked what he’d do with the winnings he replied “I guess I’ll keep building boats until I run out of money.” Smart man.
A final thought from Arch Davis for the amateur builder: “Don’t point out your mistakes and nobody will ever know.”