
And made it better than new!
By Bruce Niederer — GBI Technical Advisor
Backyard pools can be a joy. They can also be an expensive, time-consuming headache. While I don’t have any ideas about how you might escape the cleaning and chlorination chores, I do have an idea that might save you the cost of replacing that old, weather-beaten blue diving board that has faithfully stood a stoic guard over the deep end all these years.
There are generally two types of boards sold for backyard pools. One is an all-fiberglass style that costs a few hundred dollars. The second has a Douglas Fir laminated core and costs quite a bit more. I repaired a board with the Douglas Fir core for about $150 using WEST SYSTEM® 105 Resin/207 Special Clear Hardener, a single layer of 6 oz. glass, and Z-Spar™ 1015 Captain’s Varnish. The result was a unique board that looks a lot like a stripper canoe and has garnered compliments all summer. Here’s how I did it.
First, I removed the existing overcoating, which is a polyester resin and a single layer of lightweight fiberglass, using a heat gun and a slightly dulled 1″ wide wood chisel. Dulling the chisel helps prevent gouging the wood beneath. I found a basically sound laminate core that had widthwise through-bolts at each end with a small amount of rot, some areas of splitting between the planks at each end, and more rot where the anchor bolts went through.
Next, I sanded the flat surfaces using a random orbital sander with 80-grit paper. I used a finish sander on the rounded corners and edges to prevent flat spots and squaring.
At this point, I was able to determine what to do with the areas of delamination and rot. I used a cordless circular saw with a thin blade to saw kerfs into the splits between planks to expose fresh wood surfaces. I then drilled the anchor bolt holes oversized to about twice the diameter of the bolts. Additionally, I used a 3″ hole saw and sawed to a depth of about 1/2″, centered about the bolt holes, on both sides of the board. I chiseled out these 1/2″ deep circles. I did this to repair damaged wood and distribute the loads from torque pressures applied to the bolts and the surrounding area when the board is being used. Finally, I carefully chiseled out a small area around the ends of each of the through-bolts.
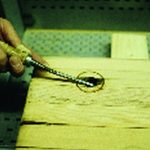
Filling each of these repairs required different techniques. I inserted a rubber cork (purchased at a hardware store) that fit the drilled hole inside the chiseled anchor bolt area. Then I poured a mixture of WEST SYSTEM 105/205, thickened with 406 Colloidal Silica to a catsup consistency, into the opening and let it cure overnight. Next, I drilled the proper size hole through the center of the filled epoxy. The hardware store also had a selection of threaded and smooth steel rods in various diameters. I selected a smooth rod of the same diameter as the drilled hole and sprayed it with non-stick cooking spray. This prevents the epoxy from bonding to the metal.
I clamped a board over each opening on the bottom and inserted a sprayed rod into each drilled hole until it touched the retaining board. I then used the same mixture of epoxy and silica but this time I added some hardwood flour until the mixture was a peanut butter consistency. Adding the hardwood flour made the mixture appear more wood-like, although in the end it still was quite a bit lighter than the surrounding wood. A better color match can be achieved by experimenting with varying proportions of the hardwood flour, which is lighter, and 405 Filleting blend, which is darker. It may also be possible to purchase wood flour to match the parent material.
I filled each chiseled out area with this mixture, making sure to overfill so I could sand it back to a smooth, flush surface. After an overnight cure I flipped the board over and repeated the process. A light tap with a hammer loosened the rod, which I removed, leaving the hole centered in the original position. I used this same epoxy-silica-wood flour mixture to fill over the through-bolts.
Because the saw kerf openings were generally quite thin and open on three sides, filling these areas proved to be more problematic. I cleaned off any loose sanding dust as best I could and applied duct tape to the underside and end of each opening. I left the top of the void exposed. I then injected neat 105/205 using a 807 Syringe into each opening. Here I had problems with leaking and keeping the tape in place and made quite a mess that required extra sanding and refinishing. In retrospect, I would try forcing a small amount of the thickened epoxy-silica-wood flour mixture into the same underside and end areas and allow this to cure and form a dam, then come back and inject neat (unthickened) epoxy into the voids. Oh well, live and learn! The neat epoxy soaked into the wood and left small depressions in each area after curing, so I washed each surface with a piece of a ScotchBrite™ pad and water and then faired with the epoxy-silica-wood flour mixture. Finally, I sanded all the filled areas smooth and fair with 80-grit sand paper.
I began the finishing process by covering the entire board, one side at a time, with two coats of 105 Resin and 207 Special Clear Hardener. I applied each coat using a foam roller and tipped each time with a small piece cut from a roller. Between each coat I washed with a ScotchBrite pad and water and sanded lightly with 80-grit paper to promote proper secondary bonding. The sanding was especially necessary after the first coat cured because of outgassing from the wood. This forms tiny bubbles in the cured epoxy surface as the epoxy displaces air present in the voids between fibers near the surface.
(Note: Multiple coats of epoxy can be built up in a single day by allowing the first coat to cure to a point where it just becomes “tacky” and then applying the next coat, making it unnecessary to prep between coats. Outgassing may still occur and require attention.)
After both coats had cured and been prepared for further coating, I applied a single layer of Episize™ 6 oz. fiberglass fabric on both sides of the board from end to end, leaving the sides uncovered one plank in from each side. I applied the glass with an 802 Plastic Squeegee and 105/207, one side at a time, leaving enough overhang so that the glass covered each end. The overlap in the glass at each end provides for continuous fiber reinforcement.
The cut edges of the glass produced some “stragglers”—loose strands that I pushed up on the edge of the glass while the epoxy was still wet. When cured, the stragglers formed hard spikes which I then sanded off, making the board smooth again. I then washed the entire surface with water and a ScotchBrite pad, but I didn’t sand this time so that I wouldn’t damage any fiberglass. I followed with one final coat of 105/207 to fill the weave. I washed this final layer of epoxy thoroughly and sanded lightly with 120-grit paper to prepare the surface for varnish.
A diving board is exposed to a relatively harsh environment. Along with the temperature and humidity fluctuations throughout the season there will also be UV exposure, both directly from the sun and reflected off the water surface. These conditions can conspire to diminish the appearance of a clear epoxy coating turning it cloudy and opaque. So, even though the 207 Hardener does contain a UV inhibitor, I needed to apply 2 or 3 coats of varnish to provide long term UV protection.
I masked off and didn’t varnish the area where the non-skid surface would be. I used only a pint of Z-Spar™ 1015 Captain’s Varnish, a one part varnish, to brush on 3 coats with a good horse hair brush. One must wait about 12 hours between applications. I removed the masking tape and reapplied it for each coat.
After the final coat of varnish was cured, I taped off the non-skid area. To create the non-skid surface I got a bag of sand from the local flower and crafts store and an old flour sifter I found in my basement. After coating inside the masked off area with a thick layer of 105/207. I sifted dry sand into the wet epoxy by simply shaking the sifter loaded with sand over the length of the board. The sifter was very convenient but, if one isn’t handy, a piece of screen and a coffee can or just a piece of screen will work. Sifting or screening the sand removes larger stones and makes the applied sand a uniform size. I made sure to apply the sand in excess—one can’t apply too much since the wet epoxy can only bond to a certain amount. If too little sand is applied it creates a dangerously course texture, much like a 24-grit sandpaper.
I carefully removed the tape while the epoxy was still wet and then allowed the whole thing to cure until morning. Then I brushed off the excess sand and quickly went over the glued sand surface with a sanding block and 100-grit paper to knock down any sharp edges. This technique really worked well.
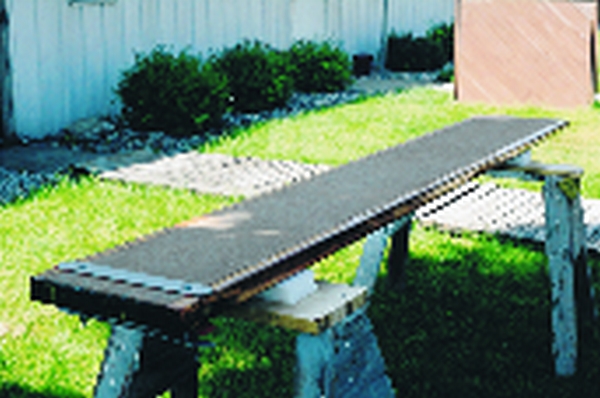
The finished board is a real eye catcher. Over the course of the summer under normal use the epoxy didn’t show any signs of cracking, delamination, or clouding and the non-skid surface looks just like the day it was applied. A light sanding and a couple of coats of varnish in the spring should keep it looking good as new. In fact, better than new!