Stayin’ Awake at Daryl’s House
Spring 2017

GET STARTED
FREE PRINT & DIGITAL EDITIONS
Spring 2017
To stay awake at Daryl’s house requires a lot of caffeine—it must if the box o’ coffee idea he came up with is any indication. Epoxyworks readers may recall his riveting article in issue 40 Dirt Bike Loading Ramp. Daryl is talented, imaginative and loves to build stuff with carbon fiber.
Inspiration hit him one day after buying a box o’ coffee (Tim’s Take 12™) from Tim Horton’s® on his way to teach a motorcycle safety class to aspiring scootertrash. Disappointed that the Tim Horton’s boxed coffee didn’t stay warm for as long as he would have liked, he salvaged the Mylar® bag with its built-in cap and built his own insulated coffee box.
You may be asking yourself “Why not just buy a decent thermos?” That’s a valid question. I have a Stanley® thermos my father bought me as a 14-year-old kid to take in the woods for deer hunting. In those days I drank warm Vernors® Ginger Ale or hot chocolate and later I started drinking coffee and discovered caffeine, my favorite addiction. The problem with the Stanley is that it only holds 7 cups of liquid: enough for a short day excursion. Daryl’s box o’ coffee holds 2½ pots of the delicious hot brew—enough for a long overnight excursion.
Let’s take a look at what Daryl did with his prototype, then at what I did to make one for myself.
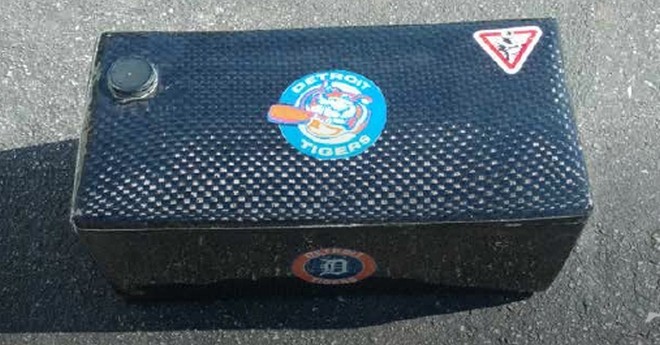
Daryl started with an empty cardboard box which he first lined with 1/4″ blue Dow® foam insulation board, inserted the Mylar bag and secured the spout and cap through a hole he created, and bonded it in place. He simply duct taped the box closed.
After taping the cap and spout with duct tape, he wrapped the box in carbon fiber cloth wet out with 105 Resin/207 Special Clear Hardener.
At this point the entire box was prepped for another coat of 105/207 using an abrasive pad and sandpaper on the end panels and a final coat of 105/207 was applied. He then added the finishing touches—Detroit Tigers decals.

Daryl’s new box thermos worked great. He filled it with hot water from our “tea spigot” that delivers water at 192°F. Recording the rate of temperature loss using a circular chart recorder, Daryl measured a loss of an average 2°F/hour at an ambient 72°F. McDonald’s serves their infamously hot coffee at 180-190°F as a point of reference.
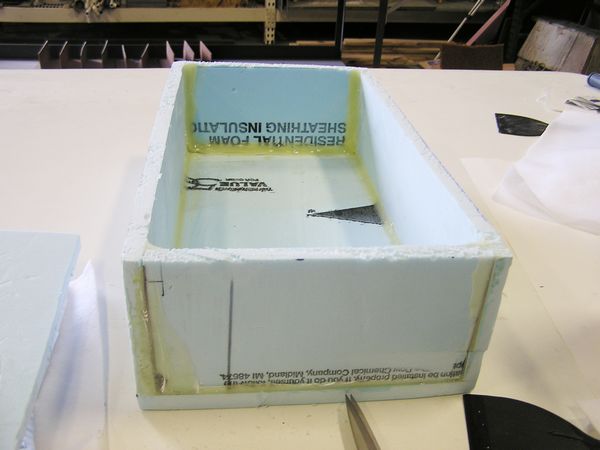
I took a little different approach to making an insulated coffee box of my own. I began by building a box using some leftover foam of Daryl’s and WEST SYSTEM® Six10 adhesive. The dimensions were arrived at by simply measuring the length and width of the flat Mylar bag then blowing it up like a balloon to get the height. Epoxy is not just the ideal resin system for building and coating with foam, it is really the only system to use because WEST SYSTEM epoxies do not contain solvents. The styrene in polyester resin will melt foam.
I left the top of the box off in order to install the Mylar bag, which I scavenged from a Lightning Sailboat Regatta this spring. I cut a hole into the top using a hole saw, pushed the top through and glued it in place using Six10.
I wrapped the bag in a length of WEST SYSTEM 881 Breather Fabric, which we affectionately refer to as baby blanket, with two thoughts in mind. First, it should add a bit more insulation to help with heat retention and second, it will hopefully protect the bag from getting punctured by a sharp bit of cured squeeze out when the top gets installed.
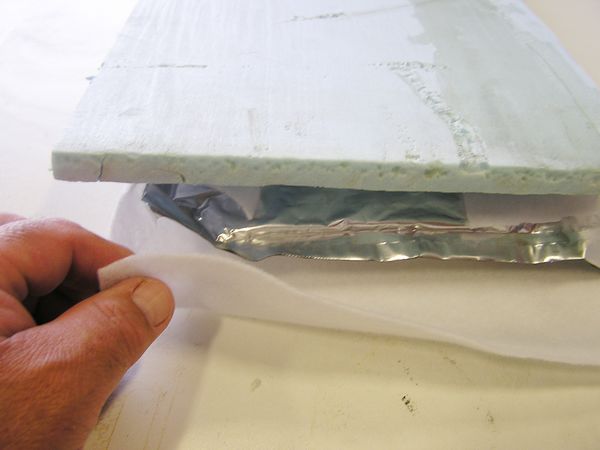
It was time to make it a box and glue the top/bag assembly on by running a bead of Six10 Thickened Epoxy Adhesive and placing a weight on it until it cured. You can see how the baby blanket wrapped around the bag.
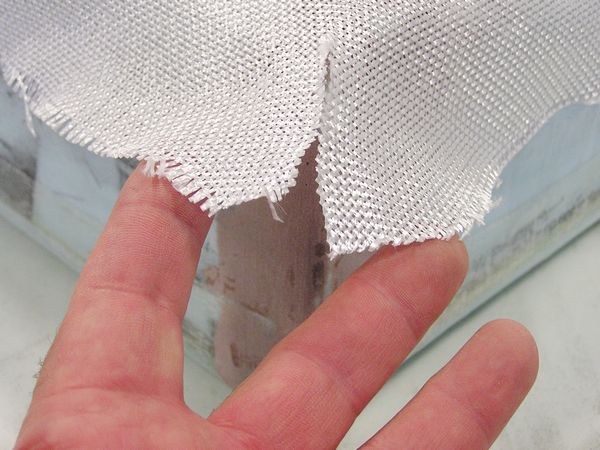
Now that I had a viable box, it was time to round all the corners and edges by sanding with 60-grit paper so I could easily apply some Episize® 731 3″ wide glass tape with 105 Resin/206 Slow Hardener.

Both the top and bottom perimeter of the box were reinforced with the 731 glass tape.
Once all this taping cured, I sanded down the corners and rough edges with an orbital sander using 80-grit, then applied 105/206 with 407 Low-Density filler added to make fairing easier.
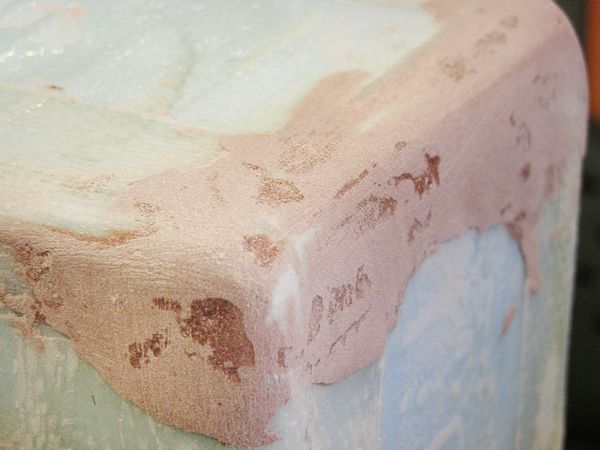
I was ready to apply fiberglass to the top and bottom of the box. I used Episize 745. The photo shows how to cut a pleat into the corner so the glass will lay down clean and flat, more or less. I cut a hole for the cap as well.
Once the top and bottom were cured and sanded, I faired the sides with a mixture of 105/206/407 and applied the fiberglass cloth to the sides directly into the uncured thickened epoxy mixture.
You can see the result was a bit gnarly but it all sanded out well enough.
Since this was made with scraps—the bag, the foam board and all the glass—my focus was on functionality, not creating a work of art. I sanded it mostly smooth and painted it.
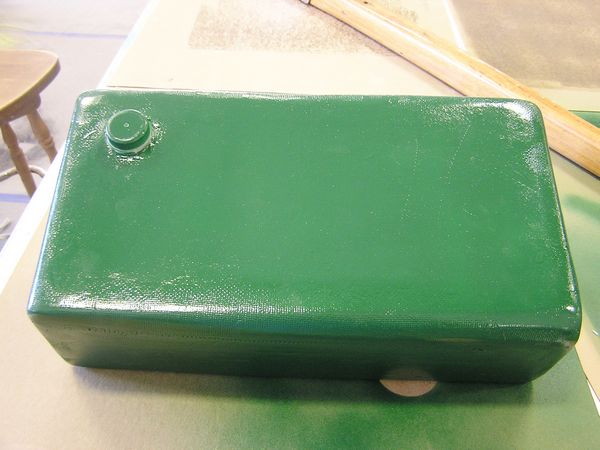
You can still see the fabric weave and lots of areas that could use a bit more sanding, but there are no sharp edges and it will hold coffee—lots of it—and keep it hot for a long time.
One last tip that may be the most important one to make this all work: the box must be vented! Daryl learned the hard way when he was filling the box for the first time and promptly spilled hot coffee all over the place because the bag could not expand as it filled.
The box must be able to breathe to fill it to the brim with that tasty brew that keeps us all on our toes. To drill the hole shown here, I sucked the air out of the bag to collapse it flat in the box. I was very careful not to push the drill bit any farther into the box than necessary so as to not puncture the bag. A pressure test confirmed my success.
My coffee box will be a welcome addition to my sailboat next summer during overnight and long-distance races. Thanks, Daryl!
For more information on building coolers visit epoxyworks.com to read Using Google SketchUp to Design a New Cooler (Epoxyworks 30) and Building an Efficient Icebox (Epoxyworks 19).


