

 Listen Now
  Add to Playlist

By Jordan Teddleton
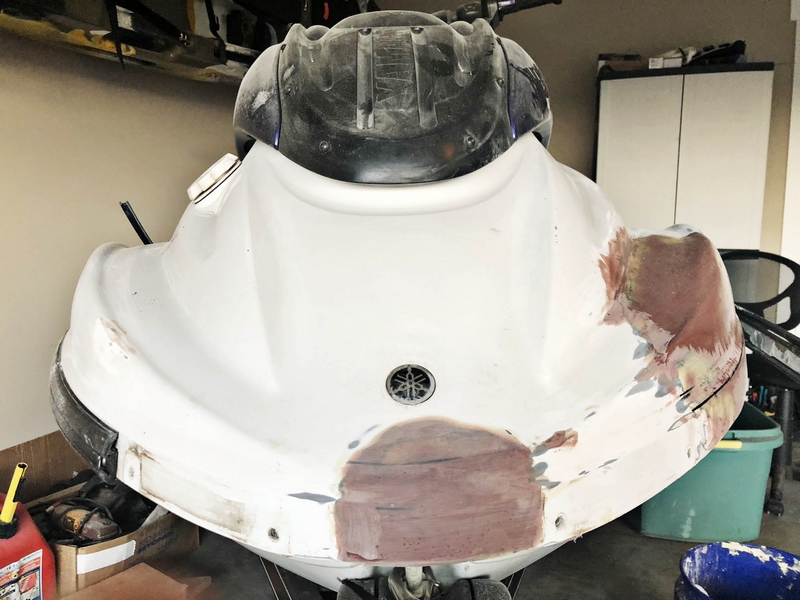
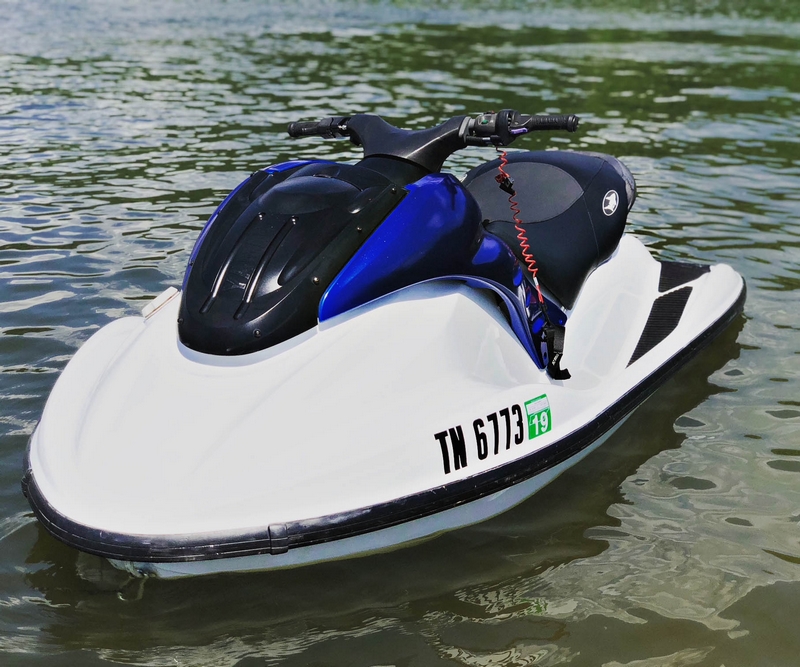
I wanted to purchase a personal watercraft so I’d be able to join my friends at the local lake for some fun in the sun this summer. Like most people on a budget, I searched Craigslist for the best deal. I needed something low maintenance, so a WaveRunner™ felt like a good fit. After a week of looking, I found a 2004 Yamaha GP1300r that appeared to be in decent shape; however, a strangely placed sticker on the top port side turned out to be covering a painful past.
I quickly learned something about fiberglass; a simple crack on the surface can be misleading as to the extent of the damage. Removing the sticker uncovered what I thought was a little crack that would be quick and easy to fix. I had no previous knowledge of fiberglass or epoxy, thus I was rather naive. I did not realize that a simple crack on the surface could result in delamination of the surrounding material.
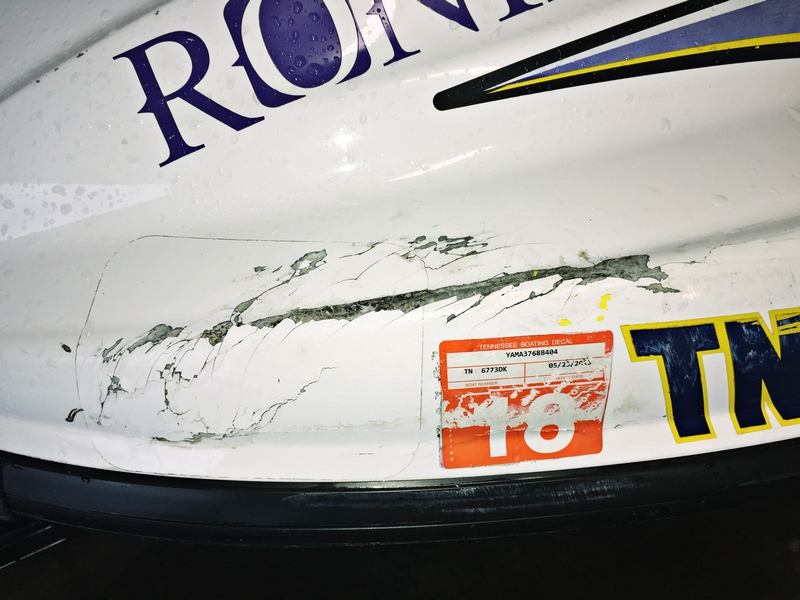
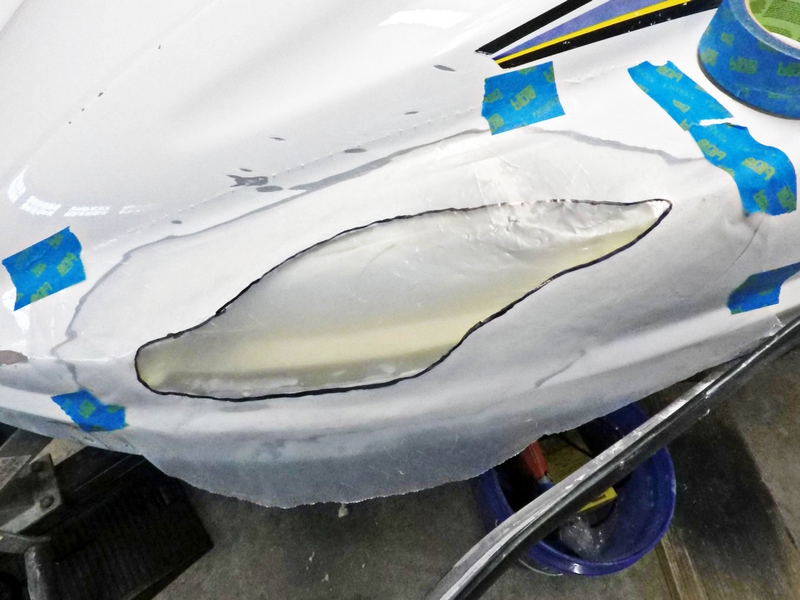
Based on the helpful advice of Technical Advisor Don Gutzmer and the WEST SYSTEM Fiberglass Boat Repair & Maintenance manual, I had to remove all the damaged material to give my WaveRunner repair something strong to adhere to. This part of the process was very uncomfortable; I would remove a little material and find that the damage propagated deeper into the surrounding material, prompting further cutting. When I finally worked my way back to solid laminate I had a fairly large hole to repair.
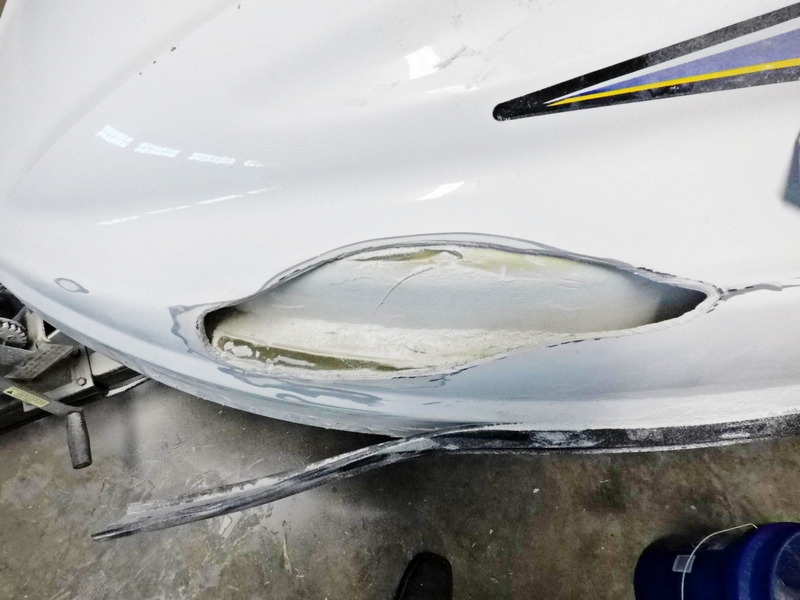
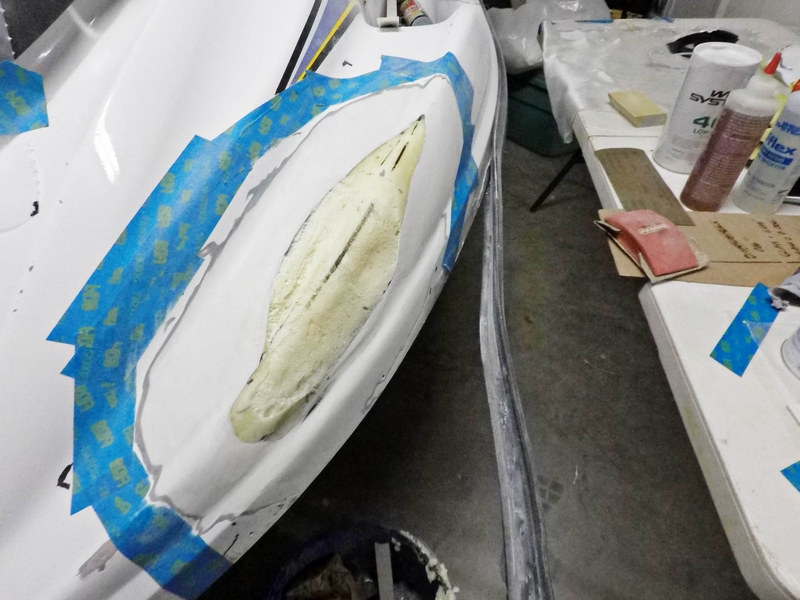
After nervously cutting away all of the damaged material it was time to prep the area for the Waverunner repair. As a general rule, the diameter of the bonding area of a repair patch should be 12 times the thickness of the damaged skin. The WaveRunner’s skin measured 0.165″ thick, requiring a bevel length of roughly two inches to ensure my repair had enough bonding area. I did my best to follow this rule, but the complicated geometry of my repair area made this difficult to maintain in some locations.
The Fiberglass Boat Repair & Maintenance manual recommends using a backing to support the wet-out fabric patch if the hole is larger than 1″. My hole was obviously much larger than 1″. Due to the lack of access to the hole from the backside, a support backing method was not so obvious. I turned to Don Gutzmer for advice and we decided expandable foam would be the best option. I purchased a can of Dow® Great Stuff™ from the hardware store and started filling the hole. After filling and shaping it a few times I ended up with a backing that followed the body lines fairly well.
With the bevel and support backing steps complete, it was time to start cutting out my Waverunner repair patches from some 10 oz. woven cloth.
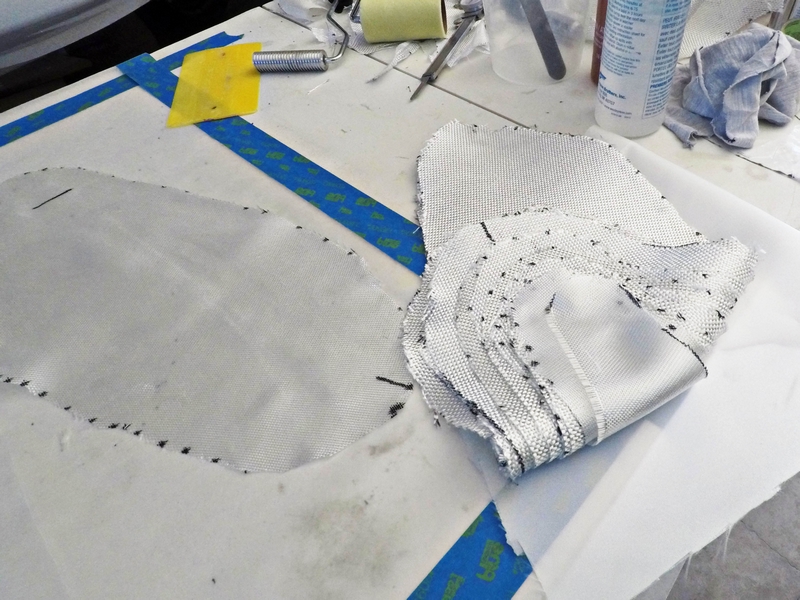
The repair skin must be laminated to the same thickness as the surrounding laminate. The first layer of cloth should fit to the edge of the bevel and each layer thereafter should be incrementally smaller with the last layer matching the dimensions of the hole. Though it may require more work, using multiple layers of a lighter weight cloth will result in a stronger WaveRunner repair.
Based on the thickness of my 10 oz. fabric, I needed 14 layers to measure 0.15″ thick. To cut out the layers, I traced the hole with some transparent plastic and used it as a template to cut out first and last layer. I then test fitted these layers, made any needed modifications, and used the layers and my micrometers to incrementally cut the middle 12 layers, small to large. This was a tedious process that was further complicated by the irregular shape of the hole, so I took my time.
At this point, it was time to lay some glass, wet it out, and repeat. I chose WEST SYSTEM G/Flex 650 for this process because it bonds well to the Waverunner’s SMC laminate. To prep the repair area before the first layer, I coated it with a layer of epoxy to fill any voids. After that, I strategically placed each layer in a large-to-small piece sequence followed by thoroughly wetting it out and using a grooved roller to remove any trapped bubbles in-between each layer. For the final step in this process, I placed a sheet of WEST SYSTEM 879 Release Fabric over the WaveRunner repair to give it a textured surface for the next step. The foam backing supported all the layers during the curing process and gave it a shape to start with.
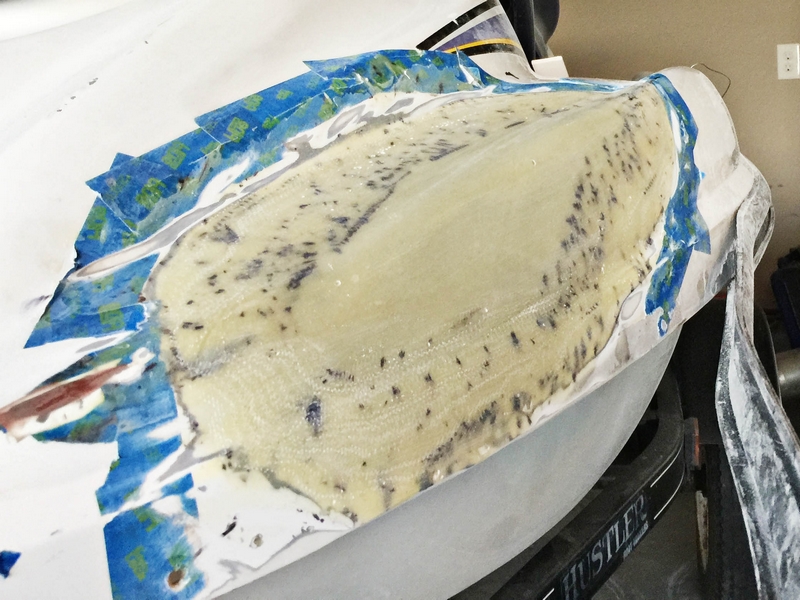
I allowed the fiberglass repair patch a few days to completely cure. Then, I sanded the edges smooth for a seamless transition. When I was satisfied with the surface of my patch I began the fairing process. This was difficult due to the complex geometry of the nose of the WaveRunner.
I purchased batten material from the hardware store to capture the highs and lows. I also used the batten to trace out some bodylines for reference. I repeated this step many times between layers of filler.
For filler, I mixed some WEST SYSTEM 407 Low-Density filler with my G/flex epoxy mixture. I had to play with the filler-to-epoxy ratio to attain the consistency I needed. A plastic spreader was used to apply my fairing mixture. Most of my WaveRunner repair was on a vertical surface so required a thicker mix. This part of the repair calls for artistic ability and patience. If the fairing mixture is applied too thickly it will sag and could fall off the surface.
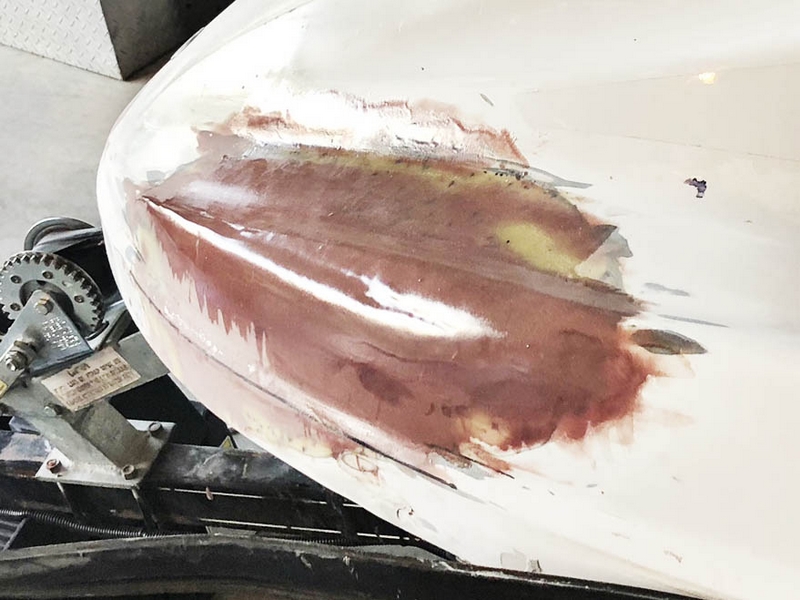
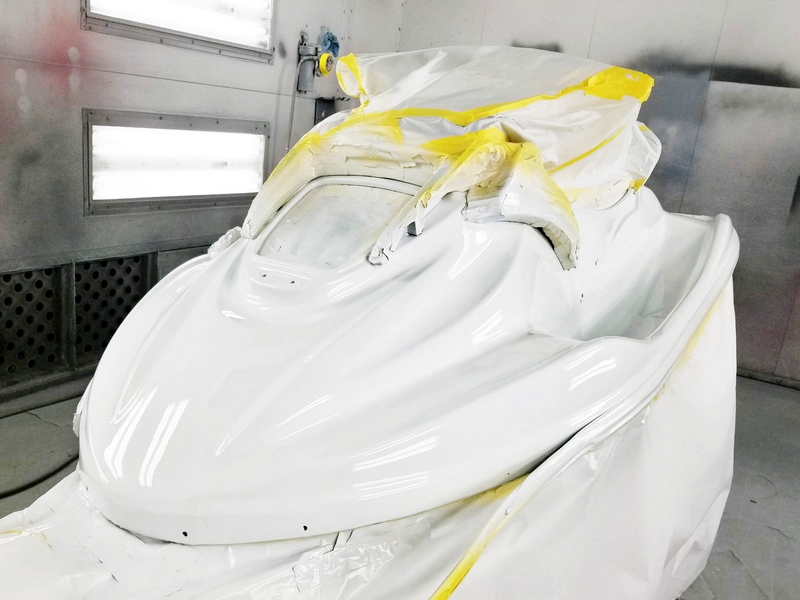
I am sure there are other repair methods and tricks I could have used, but I take pride in my repair given my lack of foundational knowledge going into this. Gougeon’s technical support and their Fiberglass Boat Repair & Maintenance manual were my most valuable assets throughout the process.
I am a mechanical engineer in a high-pressure die casting foundry and the mechanical properties of different materials intrigue me. Fiberglass is an amazing material with its high strength, low thermal expansion, and highly versatile workability.
I humbly admit that a repair of this size was a challenge for me. The advice from Gougeon Brothers, Inc. helped a lot on the WaveRunner repair.